Create, Edit and Cancel a Session
Sessions scheduled for you by your organization will appear on your session list.
Create a Session
If your organization allows you to schedule your own sessions, you will be able to add sessions to your session list.
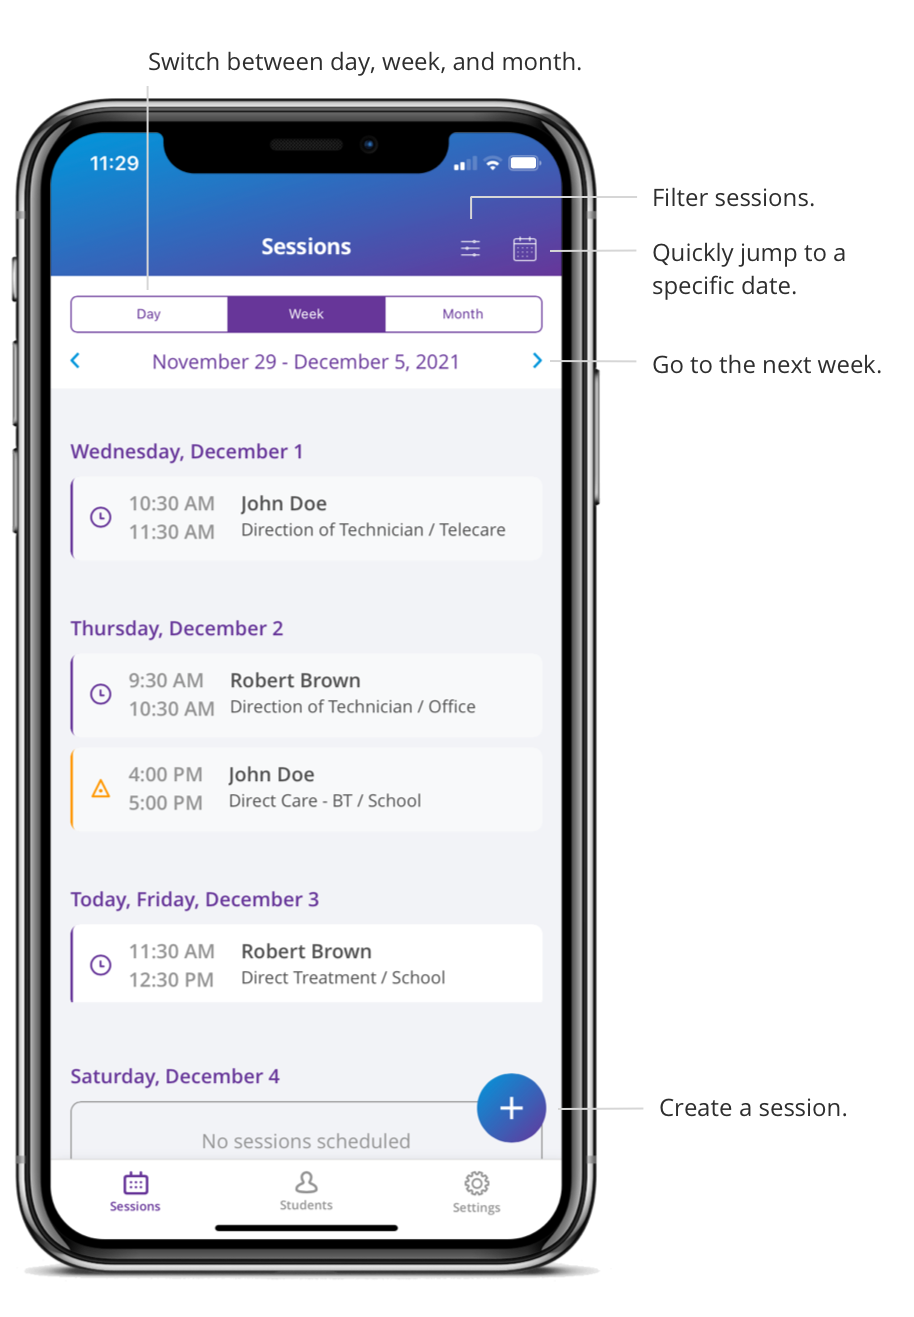
- Click the + icon in the bottom right corner.
- Fill out the required information (date, learner, service, start time, end time, location)
- Click OK to save the session.
Your session is saved and will be validated by your organization. The session status will be updated throughout the process.
When creating a session and selecting the service to schedule, you can view how many hours you are assigned to per week/month/assignment period, how many hours were already scheduled, and how many are remaining.
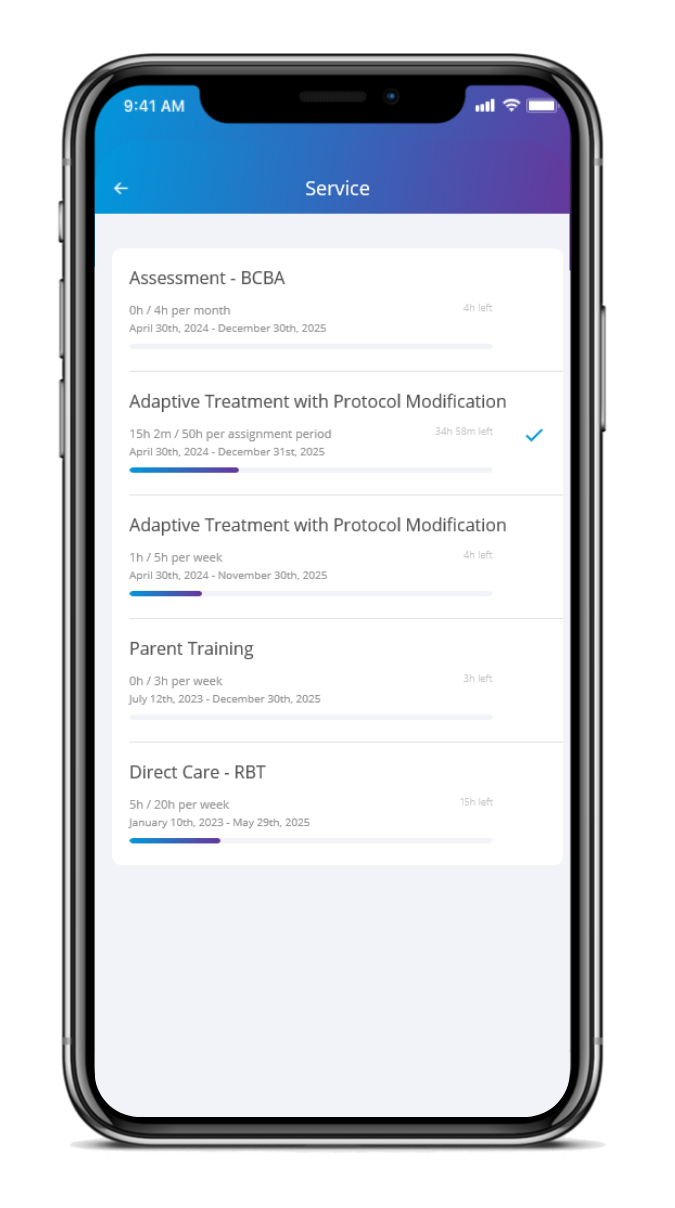
This allows you to create your schedule according to the hours assigned by your organization.
Edit a Session
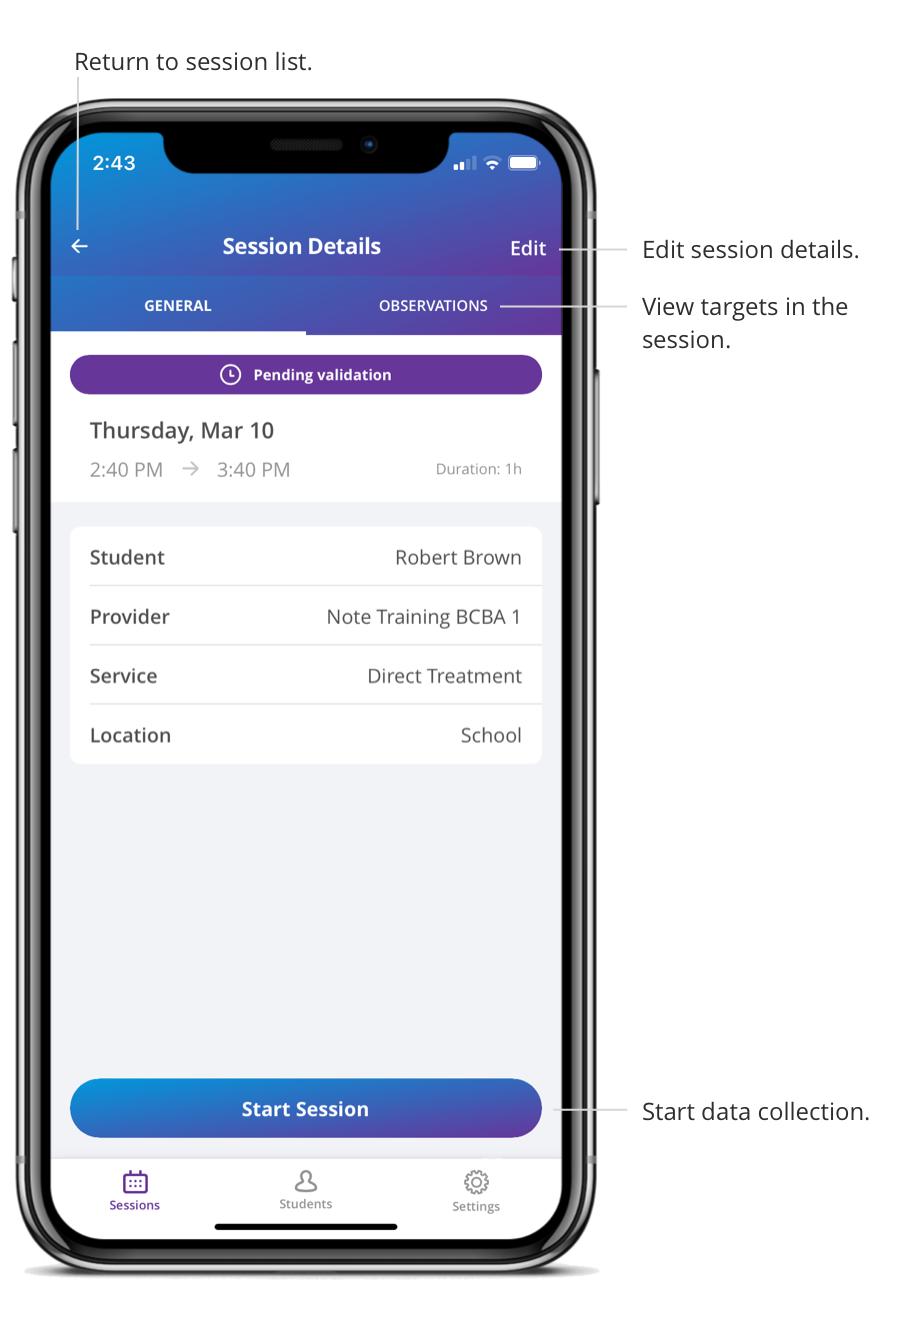
- Click on the session you want to edit.
- Click Edit in the top right corner.
- Make the change(s).
- Click OK to save.
Sessions scheduled by your organization can be edited to a different day in the same week. For additional changes to sessions scheduled by your organization (rescheduling to a different week, increased session duration) contact your organization to make these changes.
All changes are saved and the updated session will be validated by your organization.
Cancel a Session
- Click on the session you want to cancel.
- Click Edit in the top right corner.
- Click Cancel Session on the bottom of the screen.
- Choose the reason for cancelling.
- Click OK to save.
Your session has been cancelled and the status of the session is updated to Cancelled.
You can undo this action by clicking Undo on the session details screen and the session status will be updated to Pending Validation to be validated by your organization.
You cannot cancel sessions scheduled by your organization. Contact your organization to cancel such sessions.
Demo video: Create and Manage a Session