

Set up session note templates
A note template is your organization’s design for a session note. It sets the header printed at the top, the sections and fields providers fill in, the prompts that guide them, and the signatures the note collects.
This page walks through the whole feature: how you build a template in Chorus, what your providers then see in Note, and what happens after they submit. For the provider’s own instructions, see Guided session notes.
Watch the walkthrough
Section titled “Watch the walkthrough”A two-and-a-half-minute tour of everything on this page, with captions.
How it works
Section titled “How it works”| Step | Where | What happens |
|---|---|---|
| 1 | Chorus | You build a template for each kind of note: its header, sections, fields, prompts and signatures. |
| 2 | Note | The template syncs to your providers’ devices. When a provider opens a session’s note, Note builds the form from the template and fills in what the session already recorded. |
| 3 | Note | The provider completes the note, reviews it, signs and submits. Required fields and signatures are checked on the way. |
| 4 | Note and Chorus | The signed note prints in your template’s layout. A supervising BCBA can co-sign it, and you can export it as a PDF. |
Build a template in Chorus
Section titled “Build a template in Chorus”The steps below build one example: a direct treatment note with an extra Caregiver Coaching section.
-
Open Templates. In Chorus, go to Setup → Clinical Setup → Templates. You need the Manage note templates permission, which System Admins and Clinical Admins have by default.
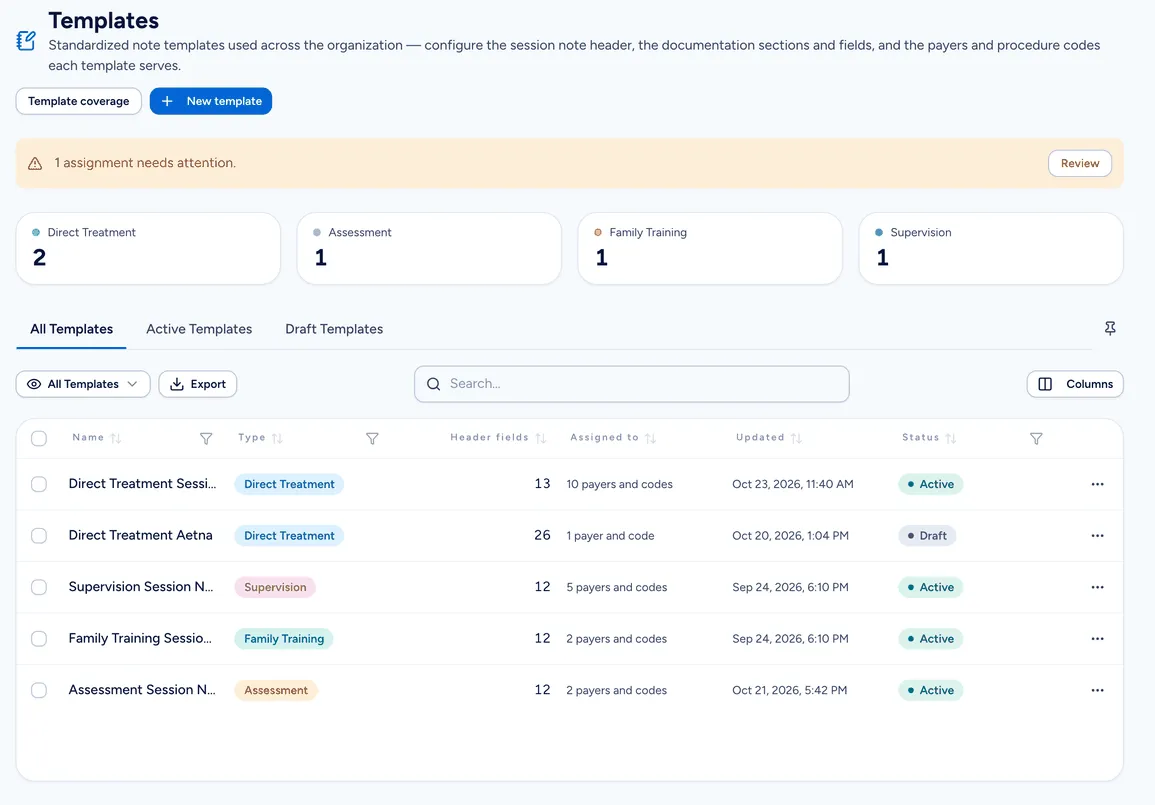
The Templates page. Each template has a type, the payers and codes it's assigned to, and a status. Every organization starts with four templates, one for each kind of note. They match the notes providers write today, so nothing changes until you edit one.
Kind of note Used for these services Direct Treatment Direct treatment and group treatment Supervision Direction of Technician and Protocol Modification Family Training Family training Assessment Assessment Other services, such as Functional Analysis and Non-Billable, don’t use a template.
-
Create a template. Click New template. Enter a name, choose the Type, and choose a template to Start from. Click Create.
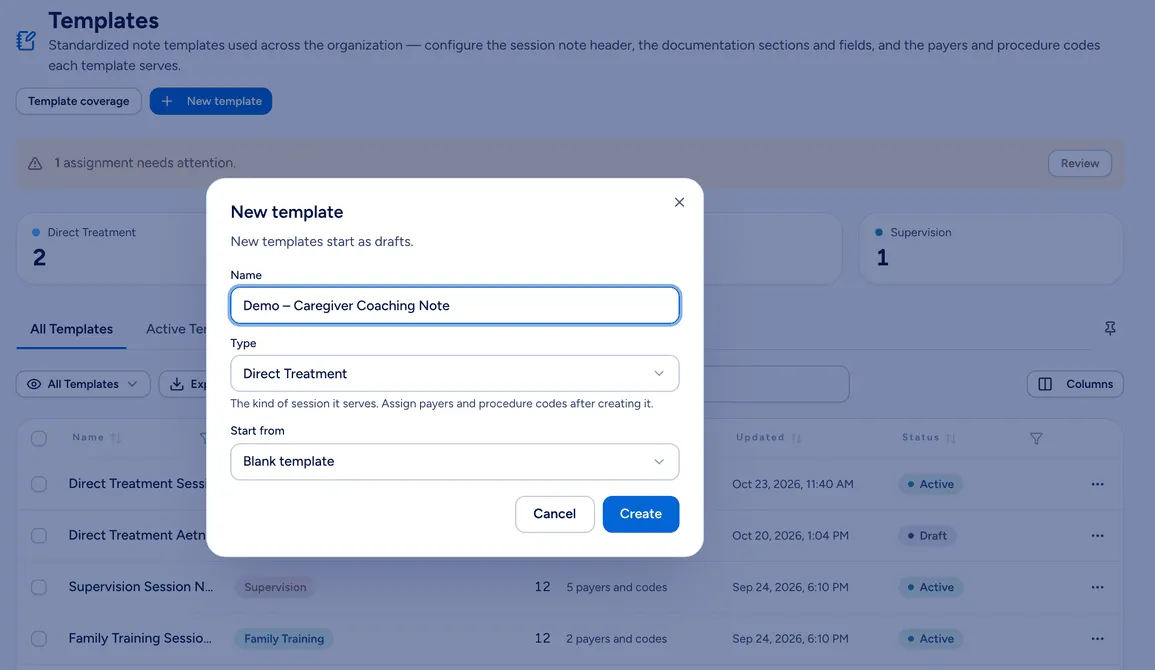
New templates start as drafts. A new template is always a draft. Providers never get a draft, so you can take your time.
-
Choose what it’s used for. Under Used for, pick a payer, or All payers, pick the procedure codes, then click Add.
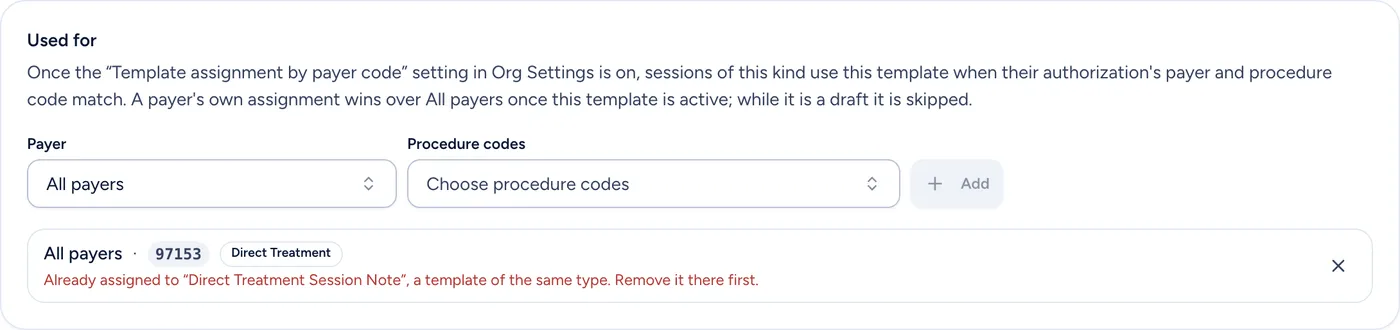
Chorus stops you assigning a payer and code that another template of the same type already has. - A payer and code can belong to only one template of each kind.
- A payer’s own template wins over an All payers template for the same code.
- A template can have up to 200 payer and code pairs.
Used for only matters when your organization assigns templates by payer and code. See How a session gets its template.
-
Set the header. The header prints at the top of the note: the learner, provider, service, dates and so on. Chorus fills these in, so providers never type them. Tick the fields to print.
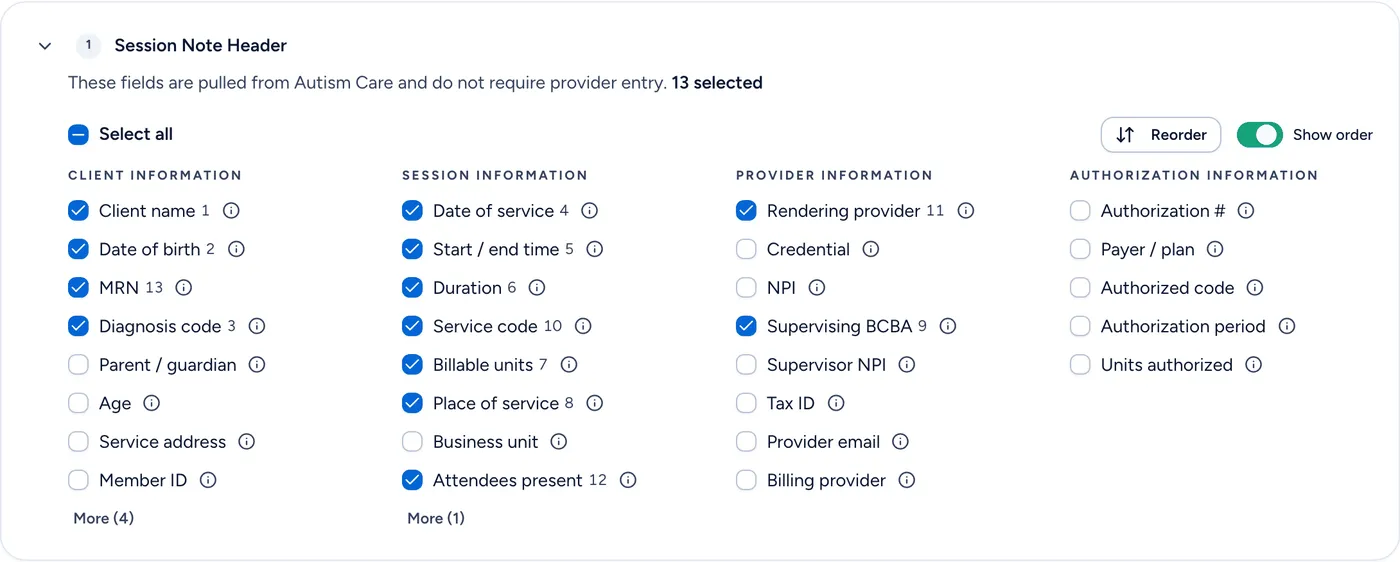
With Show order on, each ticked field shows its position in the printed header. To change the order, click Reorder and drag the fields. The header appears on the printed note only, not on the form providers fill in.
-
Set the sections. Under Structure, each card is a section of the note. Sections print as headings in this order. Drag a section to move it, rename it, remove it with ✕, or click Add section.
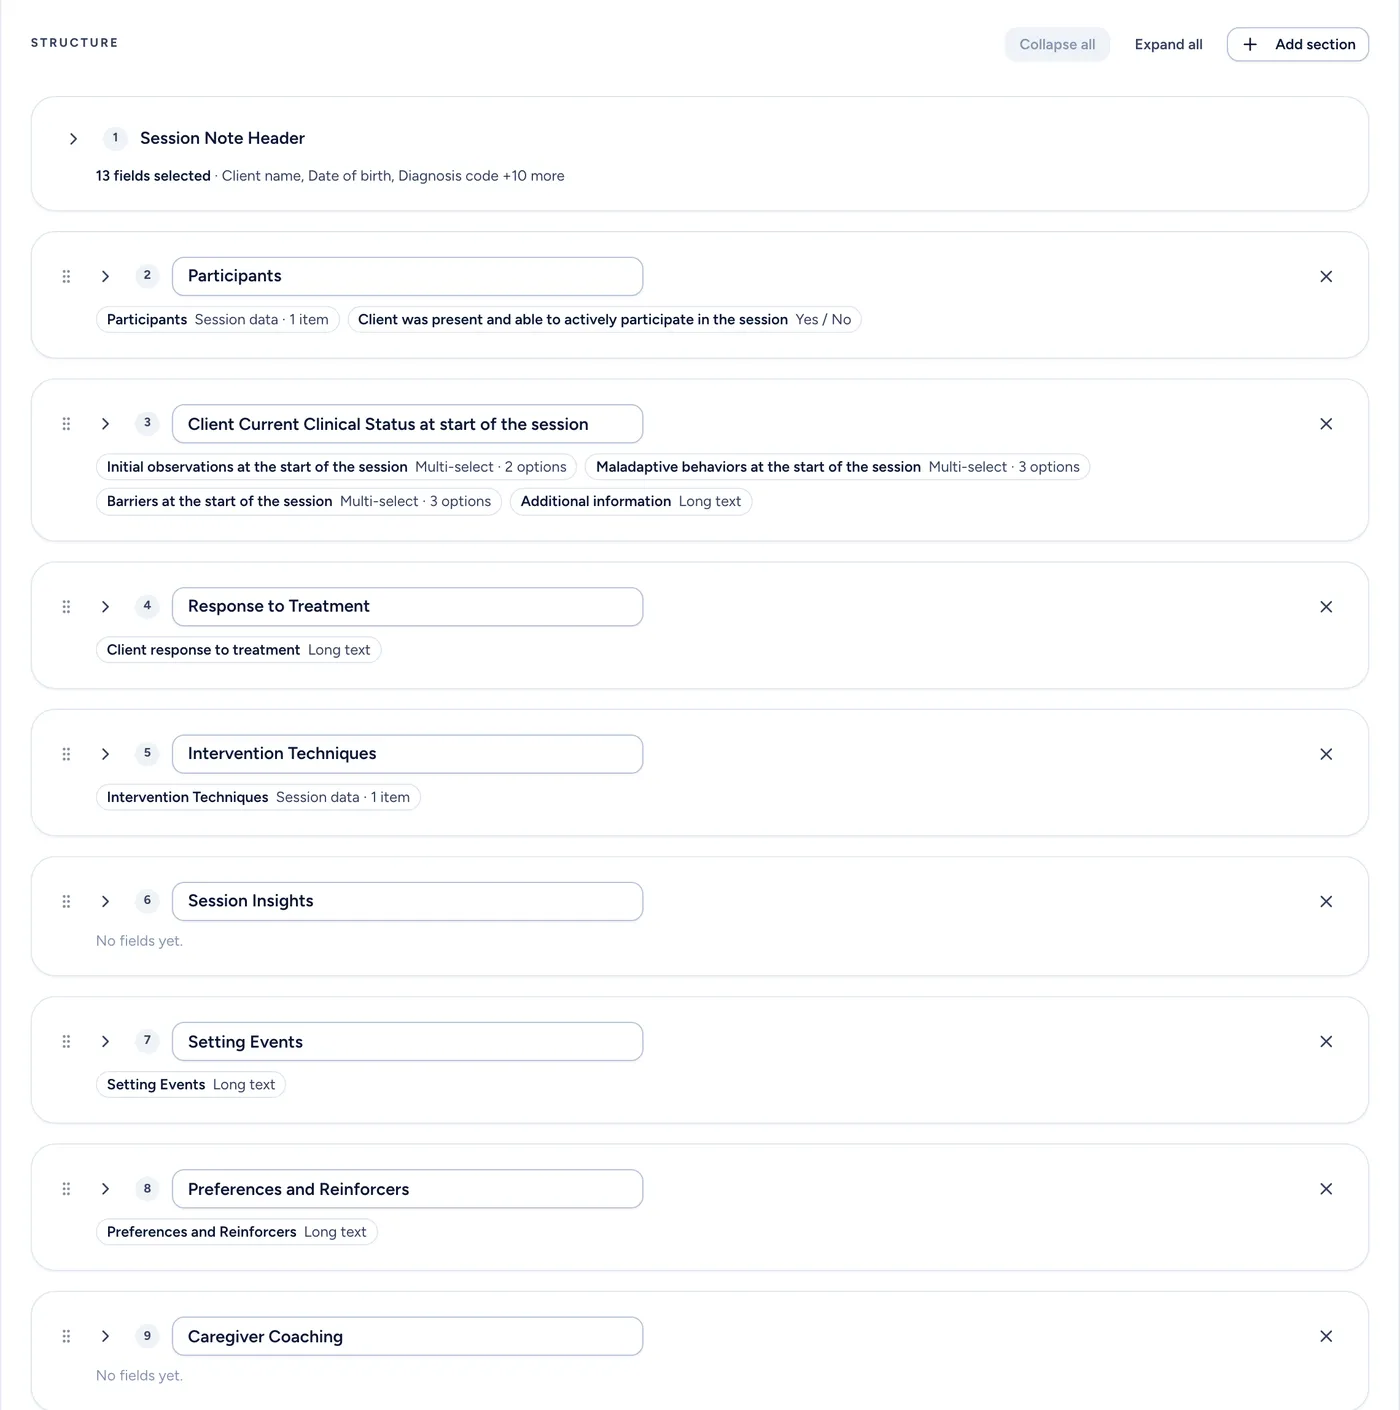
The example template's sections. Caregiver Coaching is new and has no fields yet. -
Add fields and prompts. Open a section and click Add field. Give each field a name and a type, and tick Required if providers must answer it.
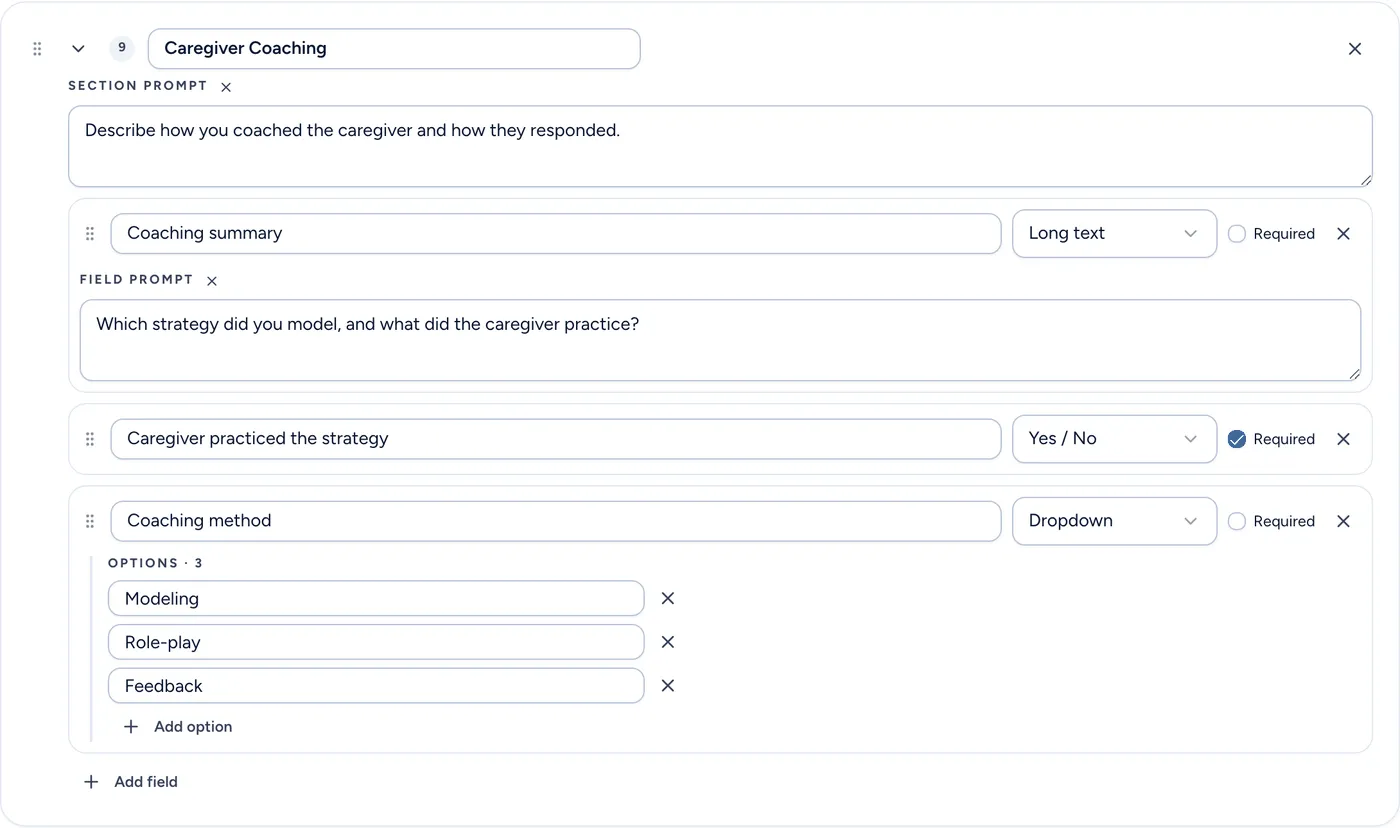
A section prompt, a Long text field with its own prompt, a required Yes / No question and a Dropdown. Field type What the provider sees Free text A one-line box. Long text A larger box for paragraphs. Dropdown A list of options to choose one from. Multi-select, Checkbox Options to tick. Numeric A box that takes a number. Yes / No Two options. Good for required compliance questions. Session data A sentence Note writes from the session. See the next step. Prompts tell providers what to write, and never print in the note. A section prompt shows under the section’s title and can be up to 2,000 characters. A field prompt shows as gray text inside a Free text or Long text box until the provider types.
A few rules:
- Dropdown, Multi-select and Checkbox fields need at least one option.
- A field’s name can be left blank only when it’s the only field in its section.
- Chorus holds Save changes until problems like an empty dropdown are fixed.
-
Choose the session data. A Session data field writes its text from what the provider recorded in the session. Tick the items it should print. Each item shows an example of its sentence.
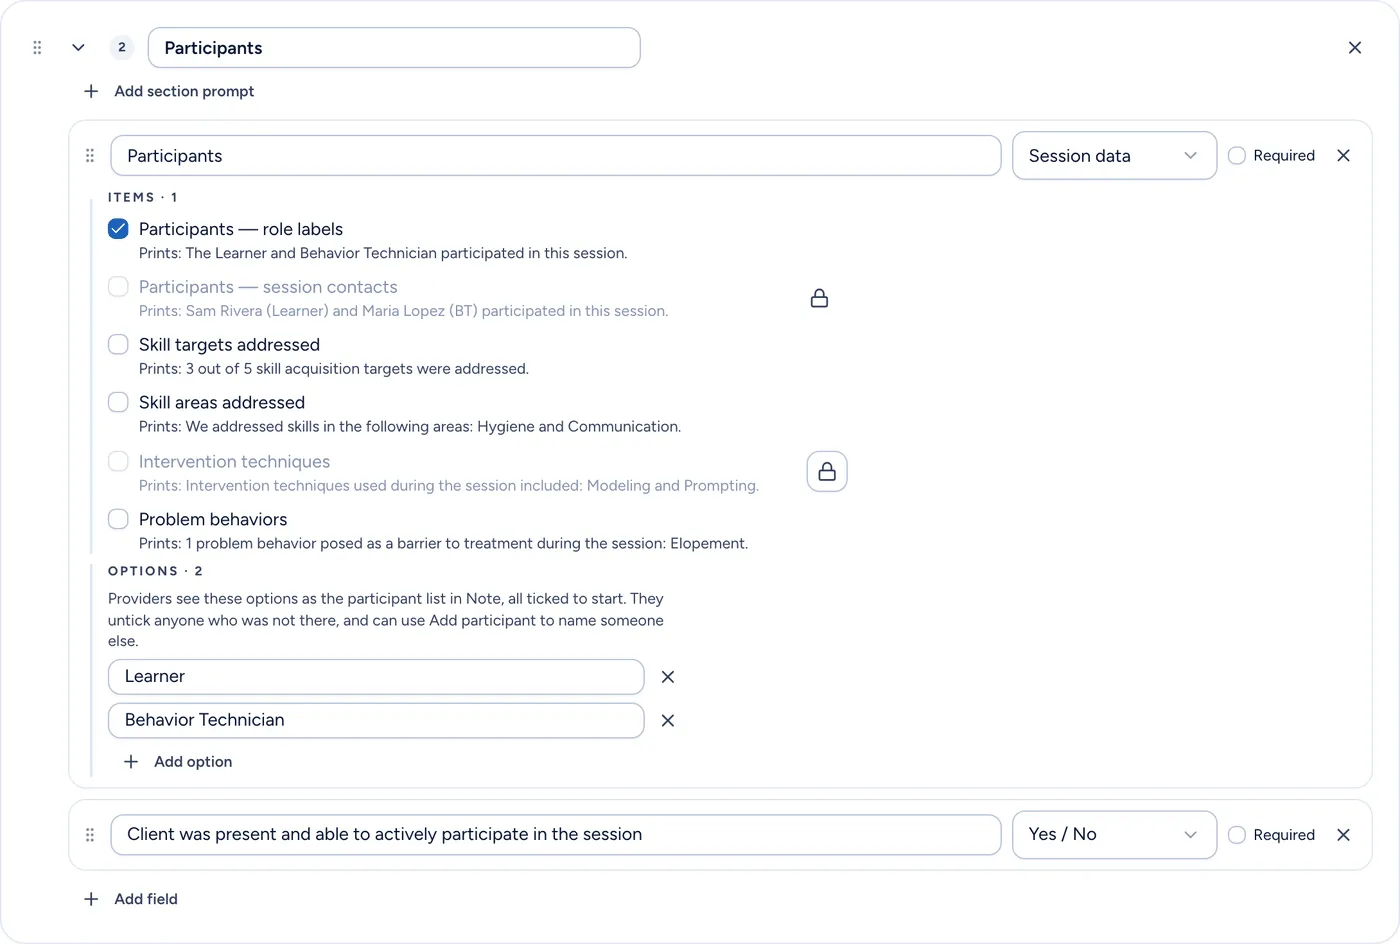
Each item shows what it prints. A lock means another field in the template already prints it. -
Choose the signatures. At the bottom of the template, set which signatures its notes collect.
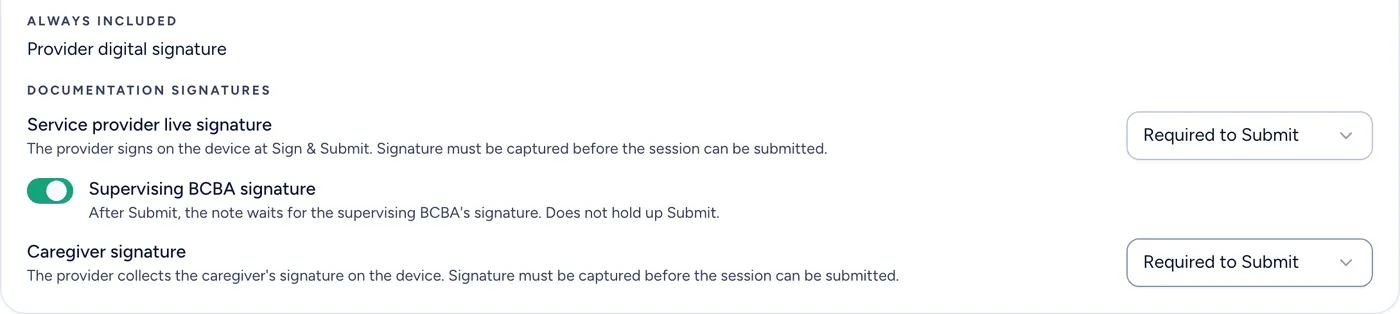
Signature Options Provider digital signature Always included. It’s applied when the provider taps Submit. Service provider live signature Not Included, Optional or Required to Submit. The provider draws it. Caregiver signature Not Included, Optional or Required to Submit. A caregiver draws it on the provider’s device, at submit or at a later visit. Supervising BCBA signature On or off. The BCBA co-signs after the provider submits, so it never holds up Submit. When the supervising BCBA signature is on, Who co-signs sets who may sign:
- Billing BCBA (claim / authorization): only the BCBA billed on the session. This is the default.
- Any BCBA on the learner’s care team: choose this only for payers that accept a co-signature from any supervising BCBA. This option is still rolling out. Until your organization has it, the template works as Billing BCBA.
-
Preview the note. Click Preview to see the printed note with sample data, without prompts. Above the page, Chorus lists any session data the template doesn’t print.
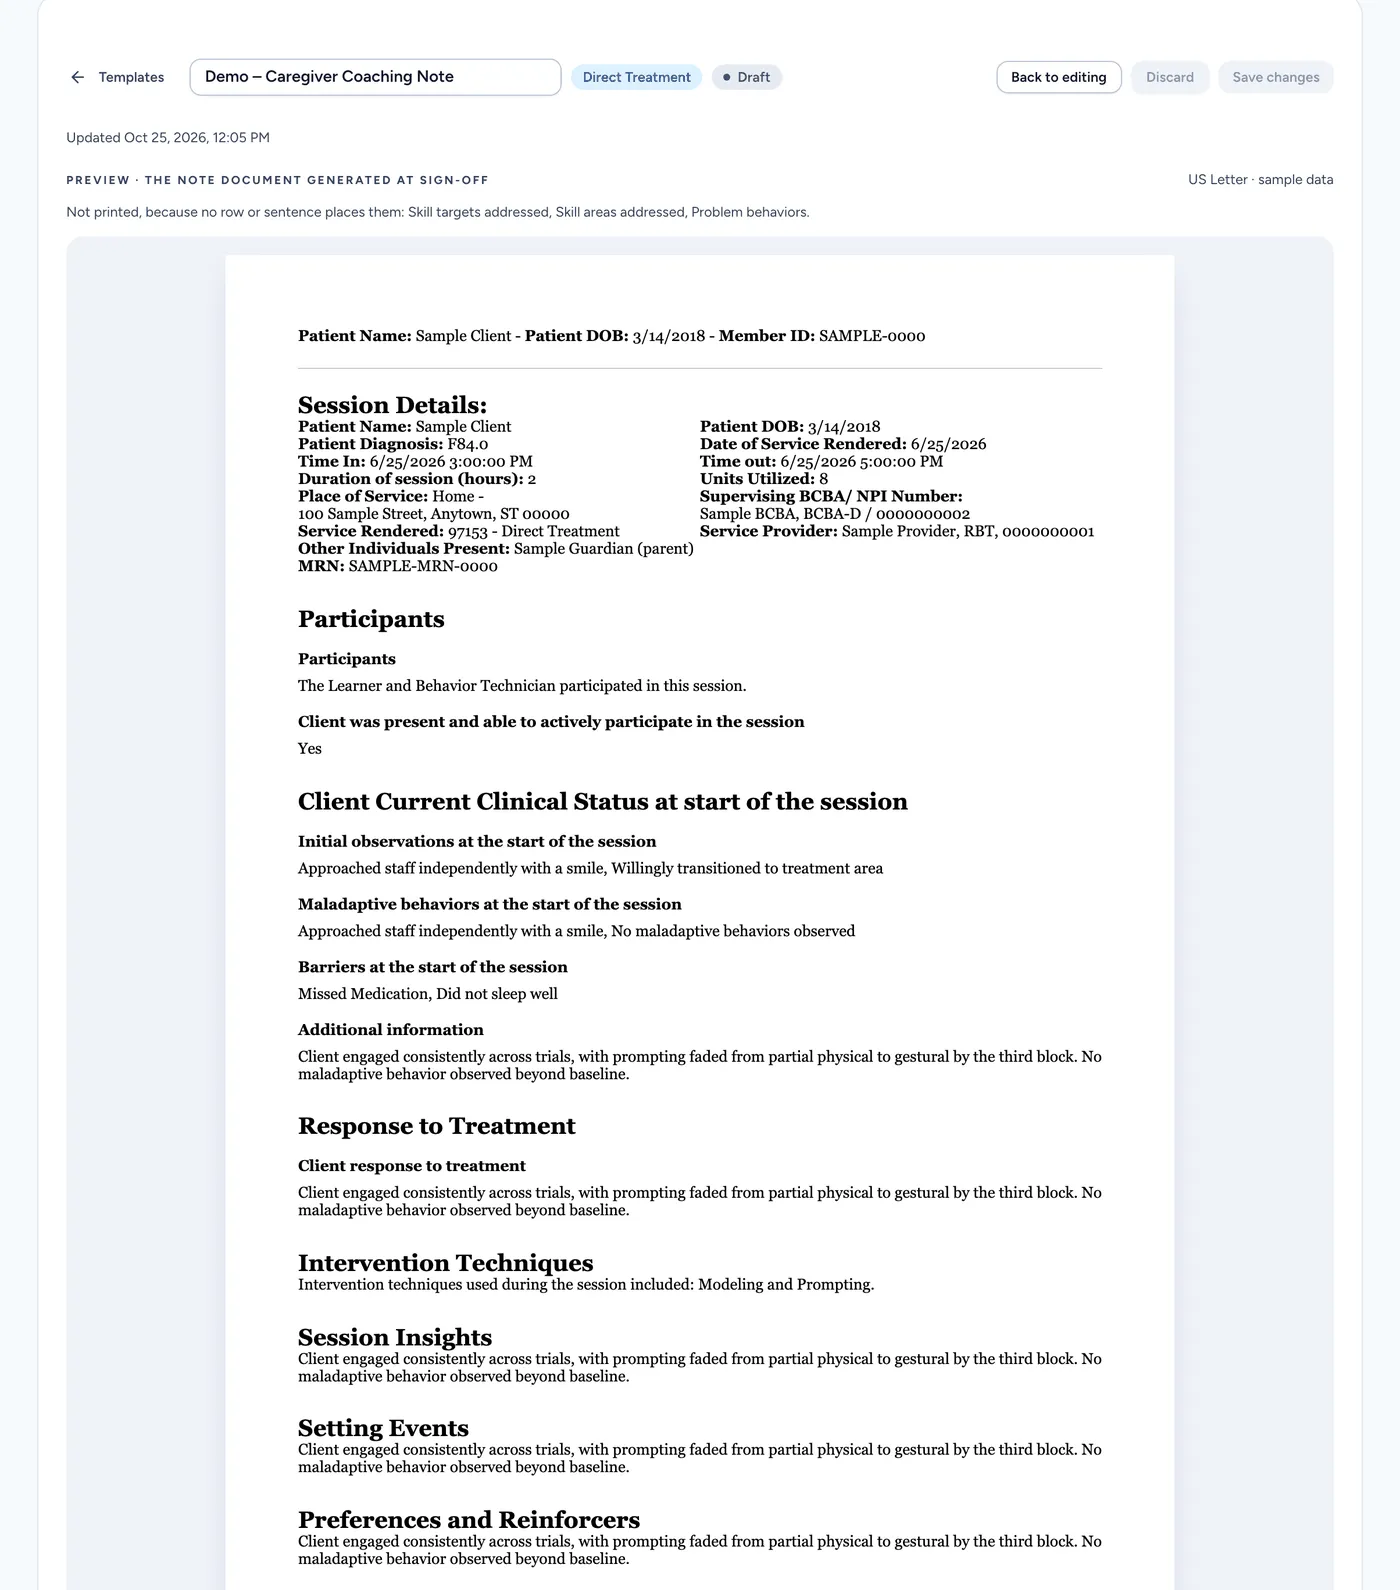
Preview shows the note as it will print. In the signed note, the sections are also numbered. -
Save and activate. Click Save changes. When the template is ready for providers, Activate it from its row menu on the Templates page.
Change a template later
Section titled “Change a template later”The row menu on the Templates page has Duplicate, Activate or Deactivate, and Delete.
- Deactivate turns a template back into a draft.
- Delete removes it. Notes already written with it aren’t changed.
- A note a provider has already started keeps the template it was started with. Notes they start later use the new one.
What your providers see in Note
Section titled “What your providers see in Note”Once templates are on, a provider opening the Session Note tab gets your template as a form.
-
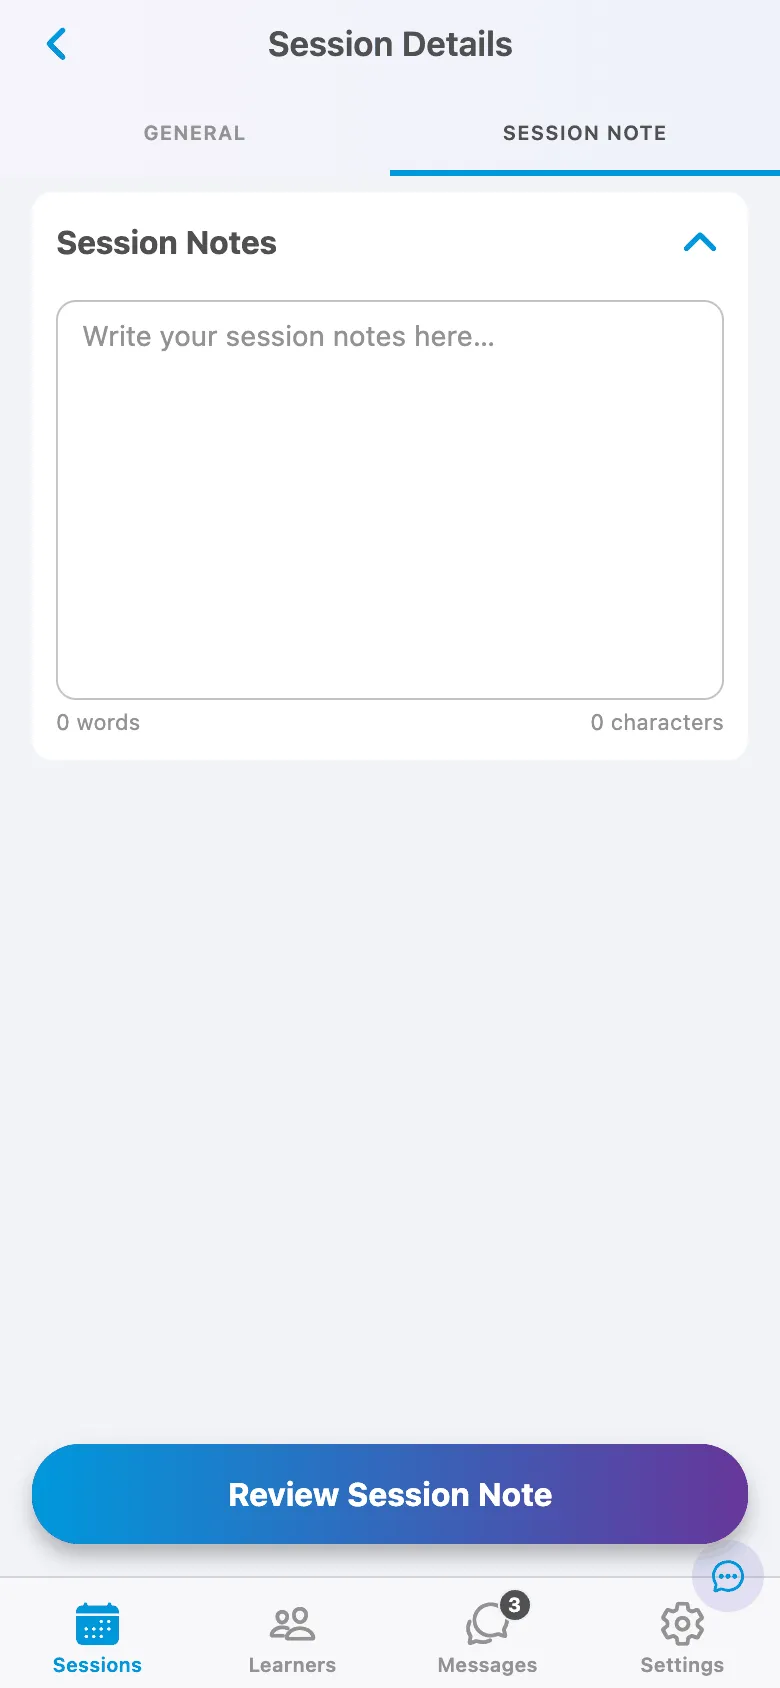
The form is your template. Your sections appear as cards, in your order, with your prompts. Note fills in what the session already recorded: who took part, the techniques used and the sentences written from session data.
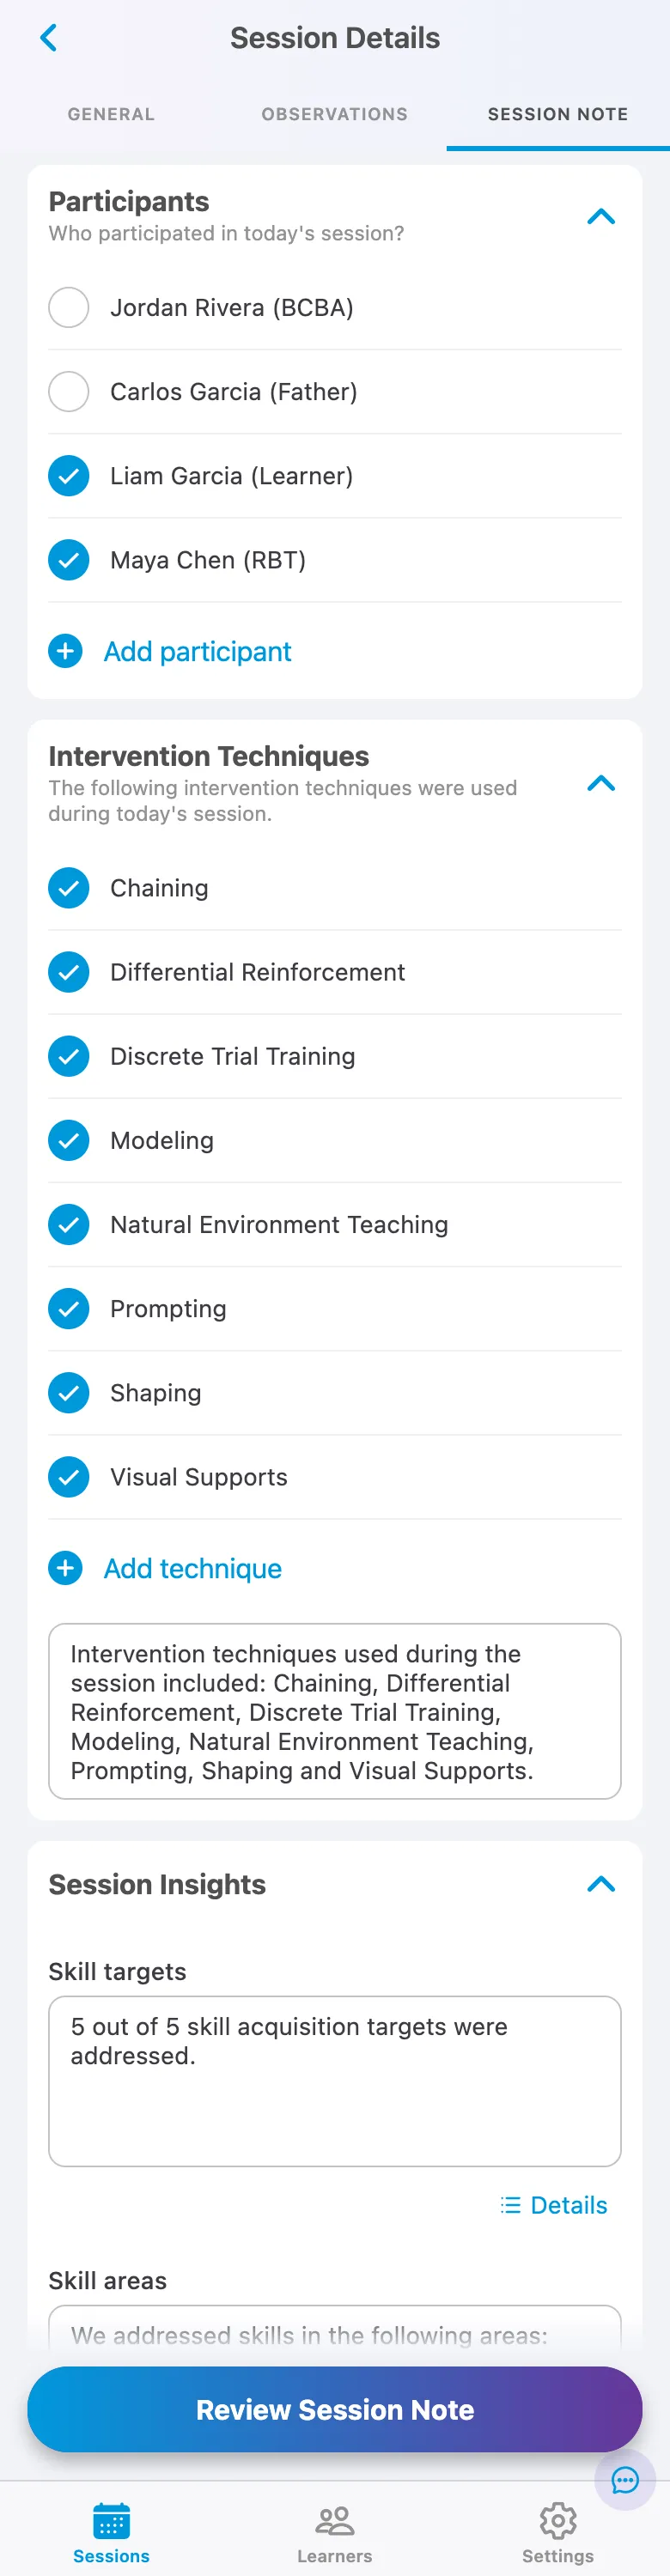
-
Required fields are checked. If a required field is empty when the provider taps Review Session Note, Note names what’s missing, by section and field.
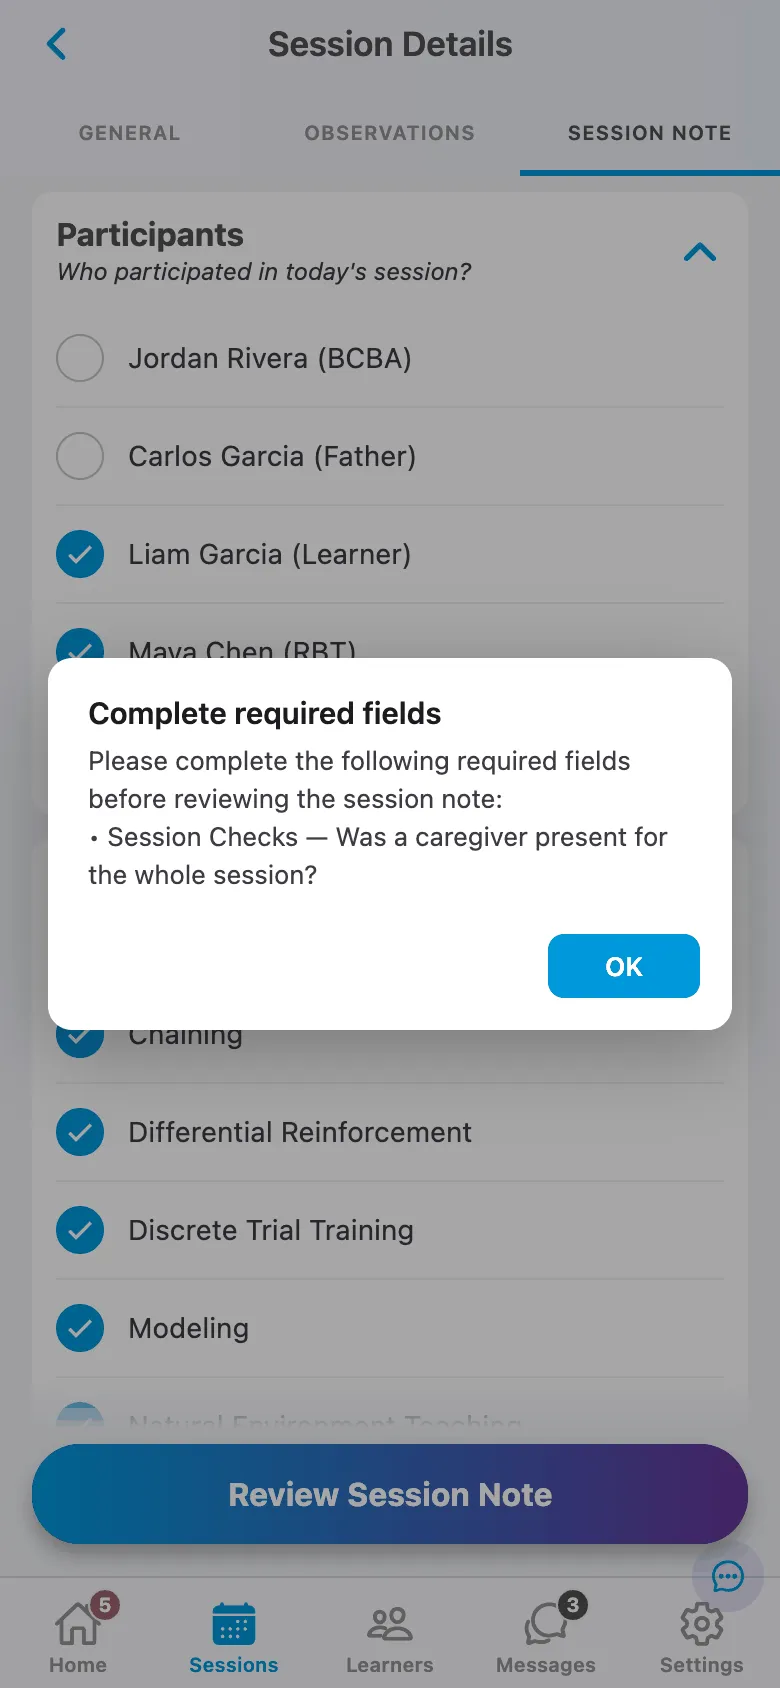
-
The provider reviews and saves. Review shows each section as it will print. The provider edits the text if needed and taps Save Session Note.
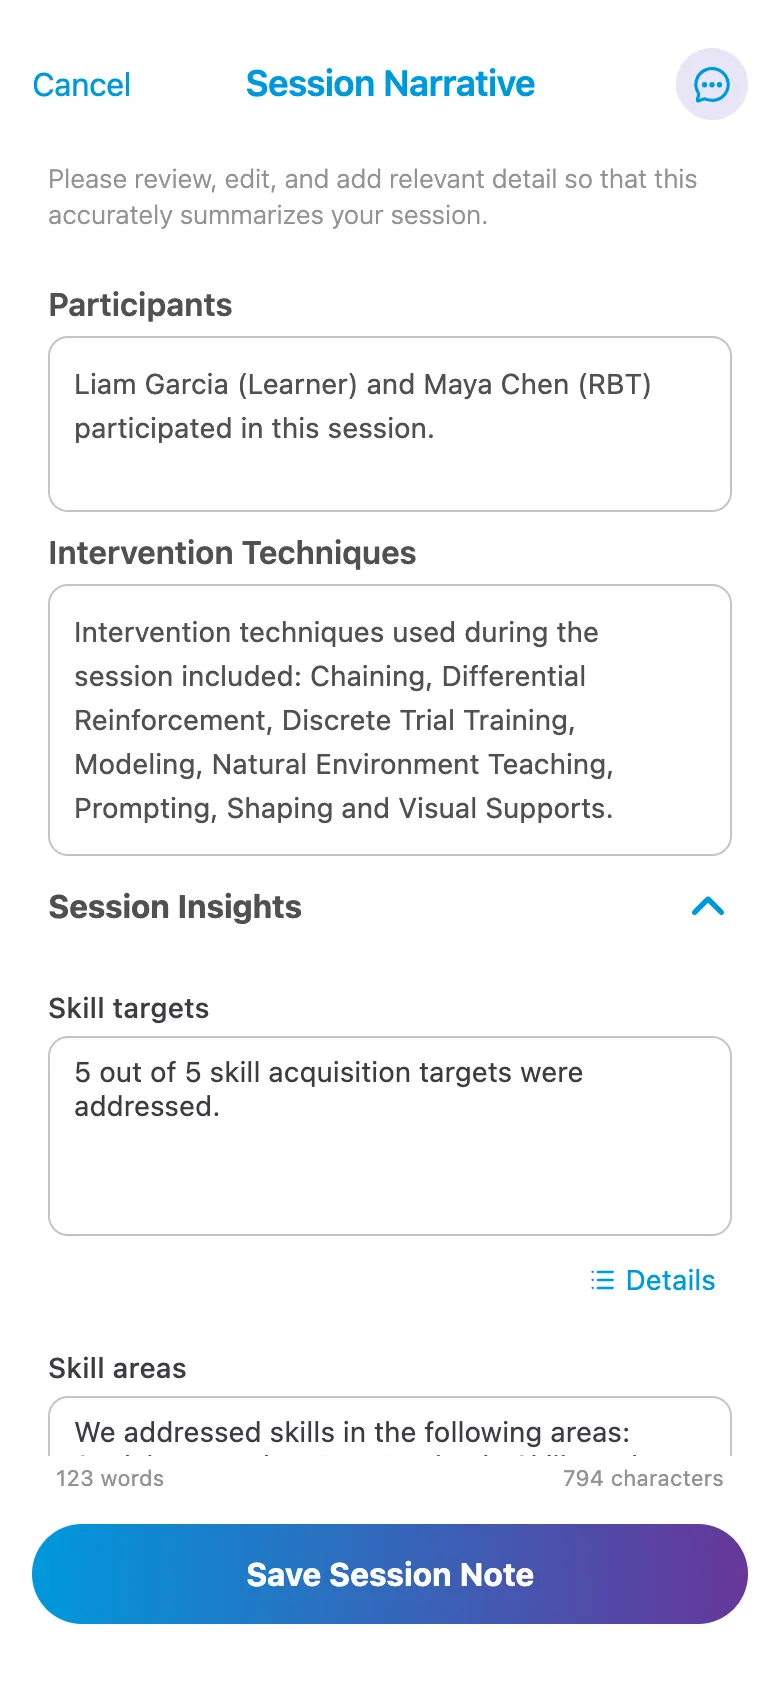
-
The provider signs and submits. Sign & Submit shows the full note first. The provider opens Signatures, draws each signature your template asks for, and taps Submit. Submit stays unavailable while a required signature is missing.
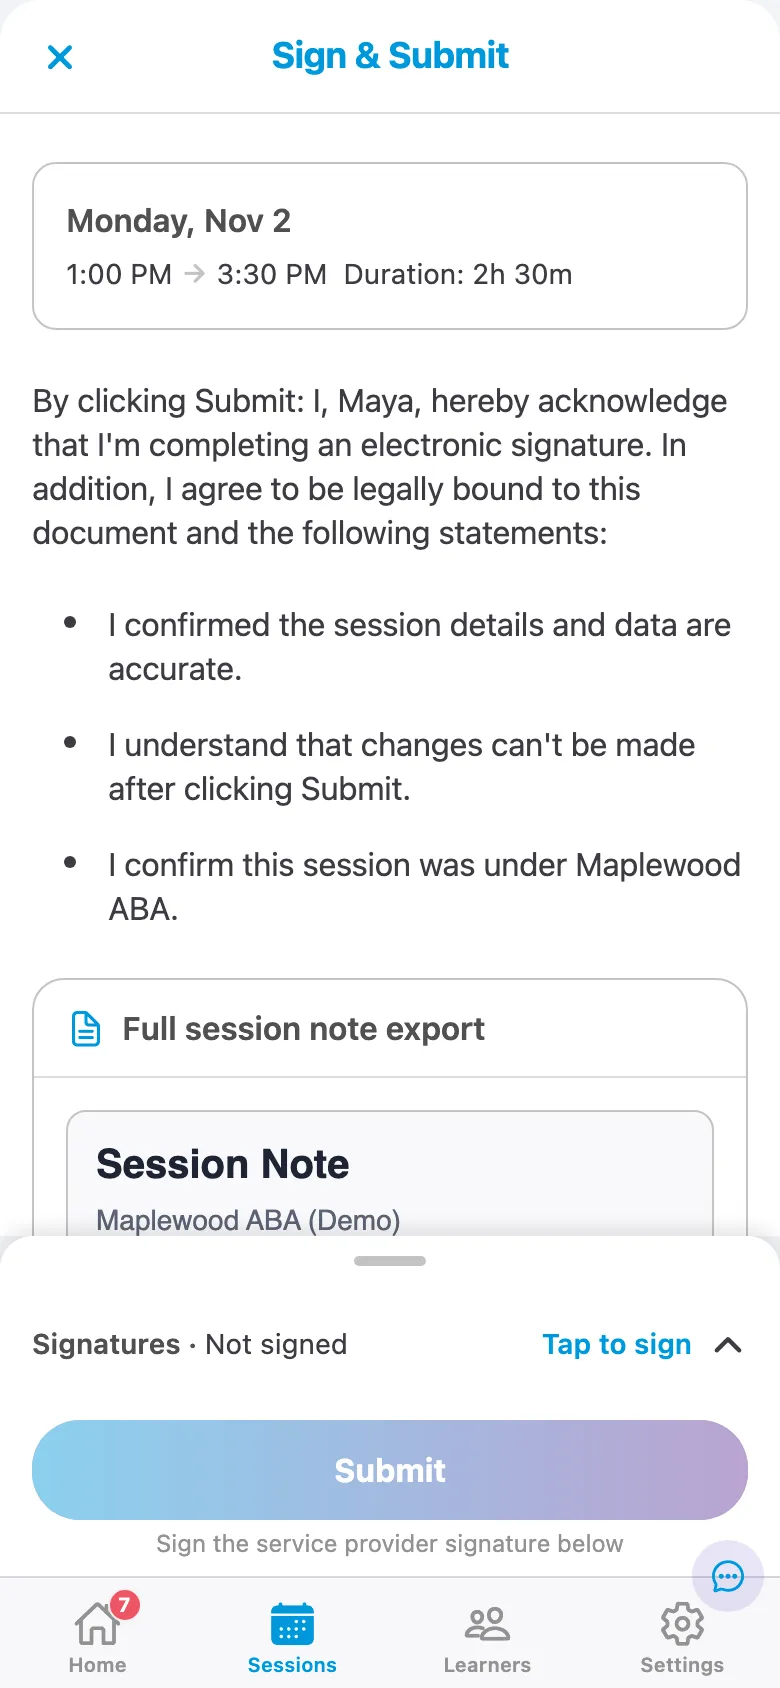
The note comes first. 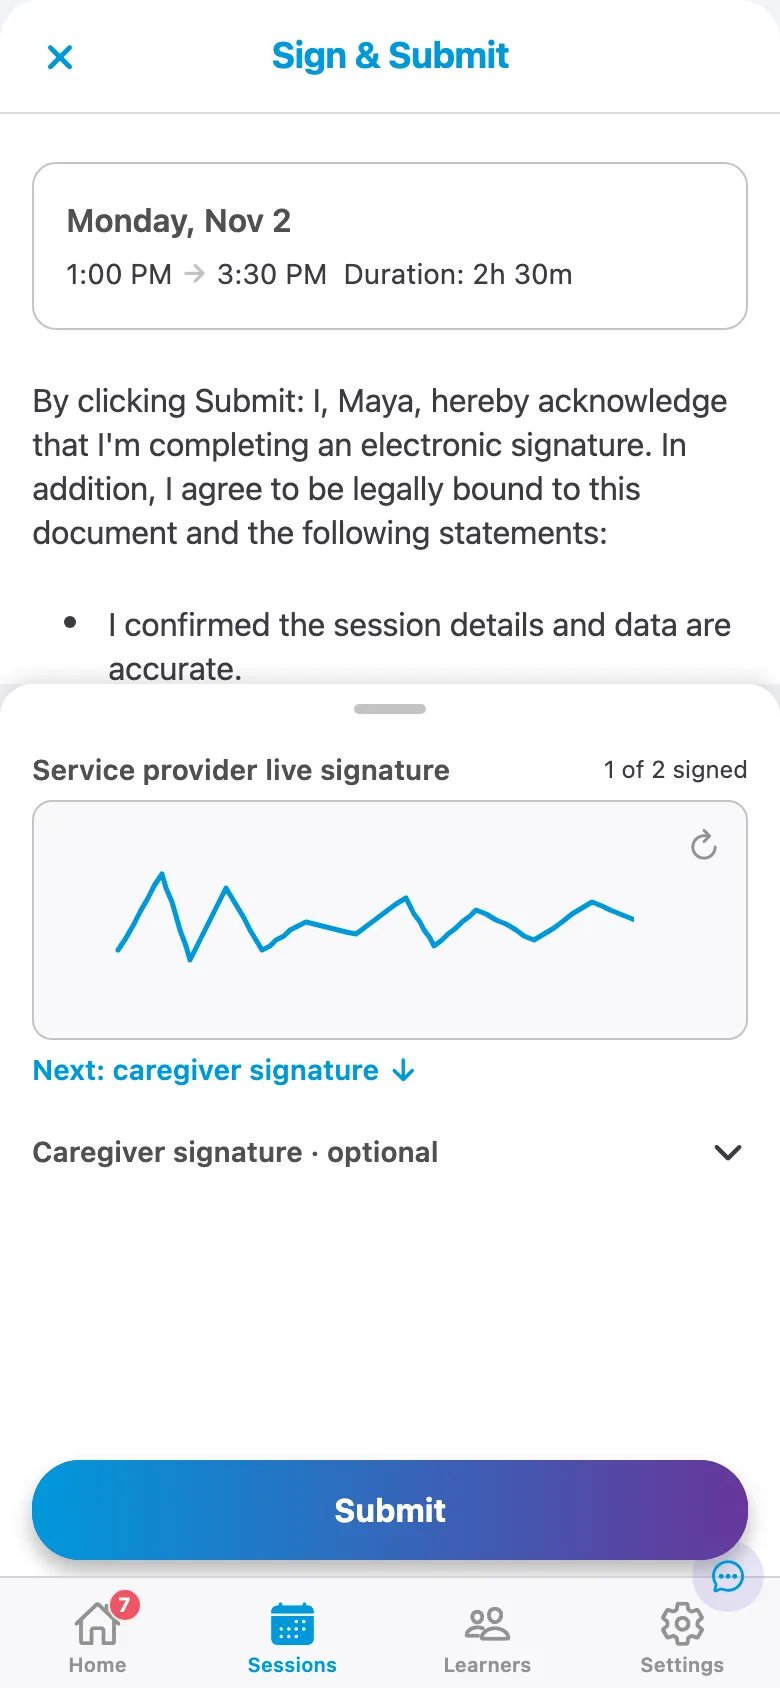
The provider signs, then the caregiver.
After the provider submits
Section titled “After the provider submits”The supervising BCBA co-signs
Section titled “The supervising BCBA co-signs”If the template includes the supervising BCBA signature, the submitted note appears on the BCBA’s Home tab, under Signatures, as a note to co-sign. The BCBA reads the note, taps Co-sign Note, signs and submits.
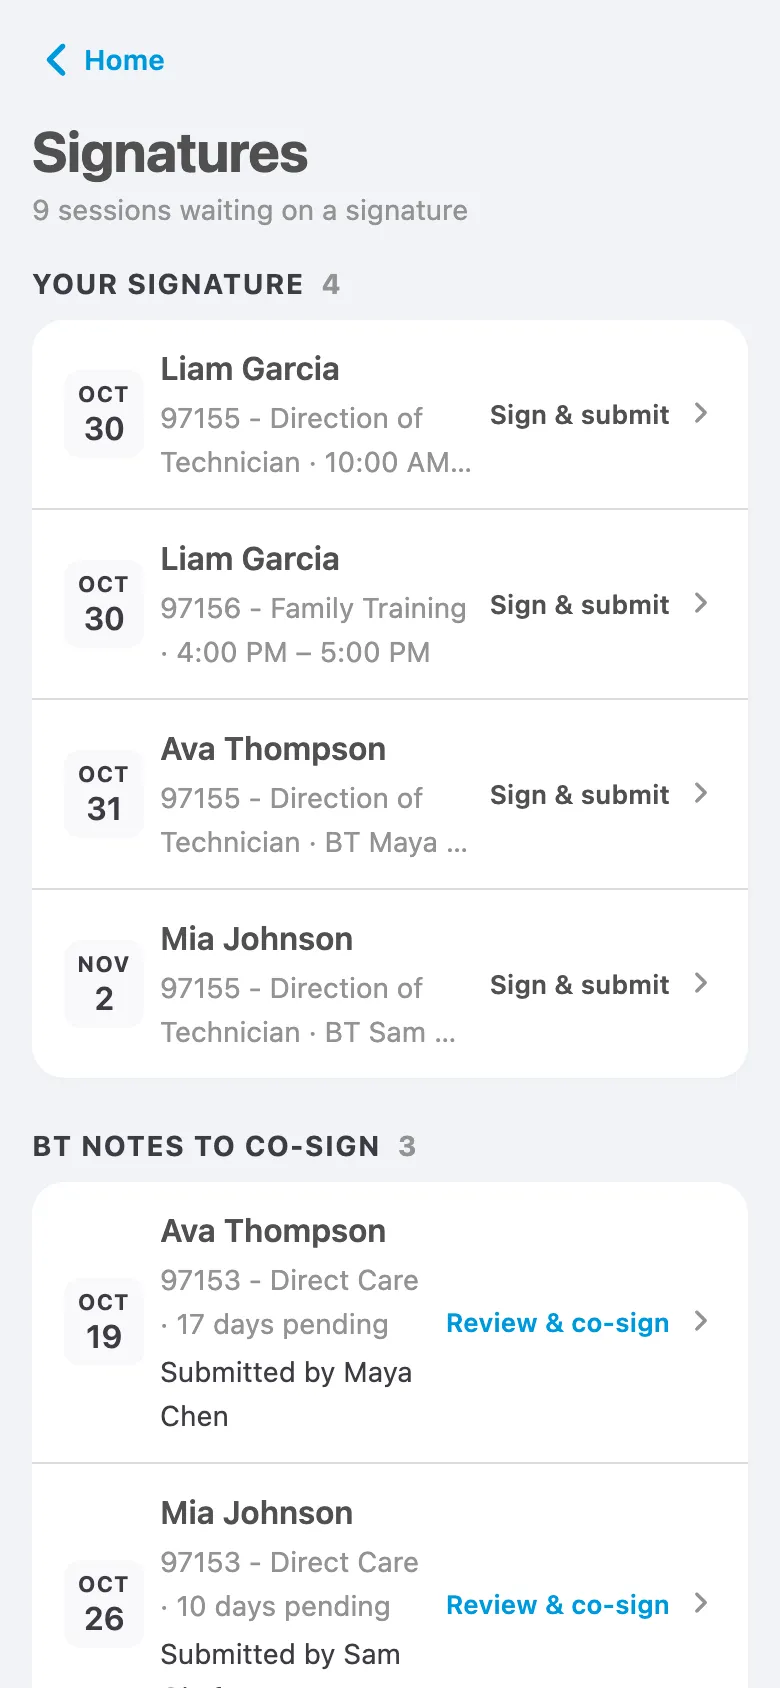
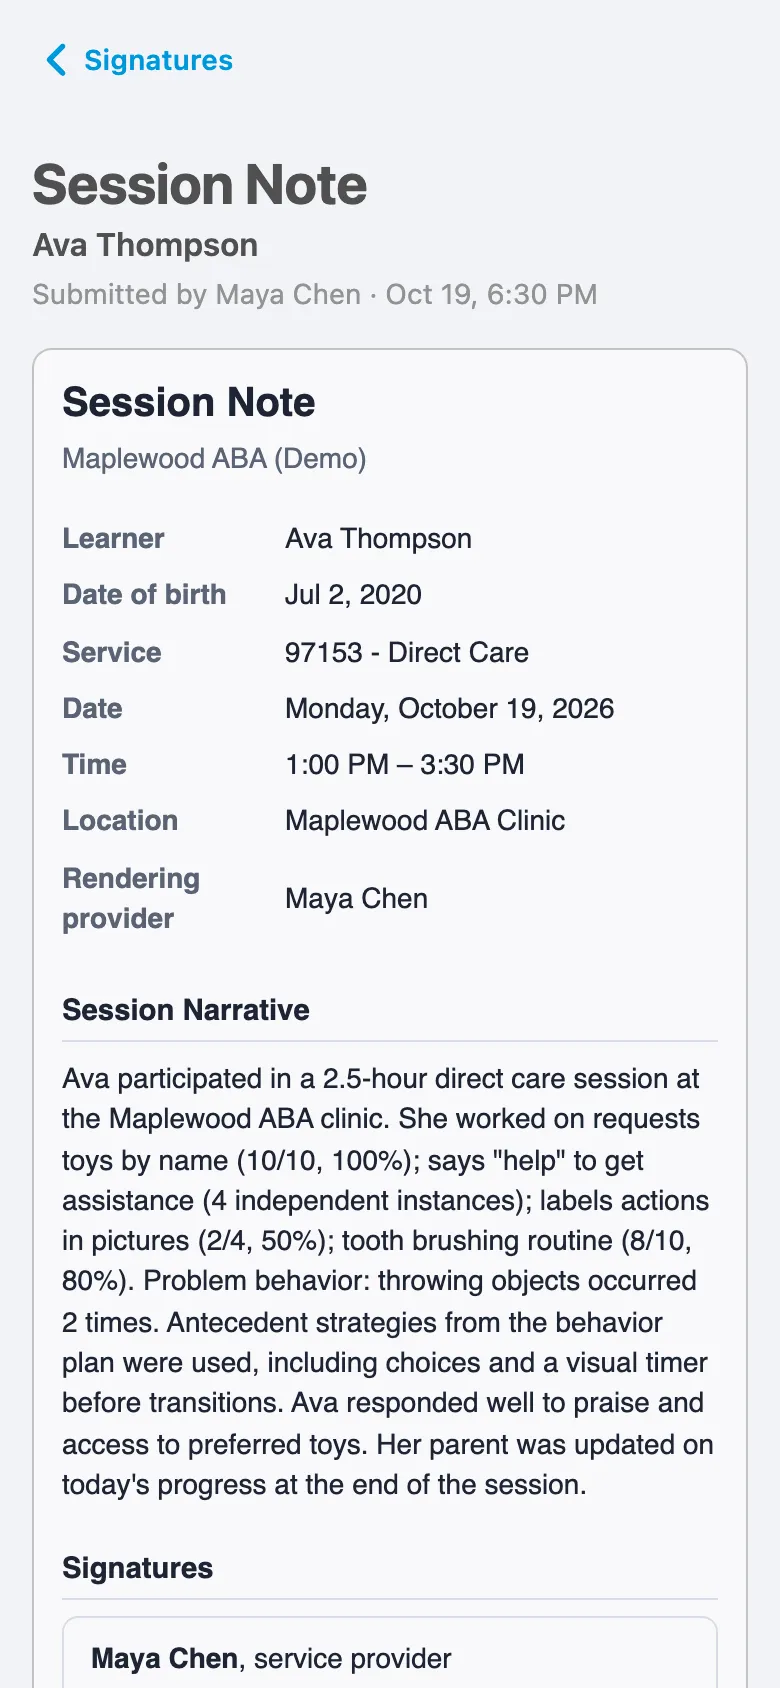
A BCBA can never co-sign a session they provided. If two BCBAs sign the same note, the first signature stands, and the second BCBA is told who already signed.
A caregiver signs later
Section titled “A caregiver signs later”If the caregiver wasn’t there at submit and their signature is optional, the provider can collect it at a later visit. The note waits on the provider’s Home tab, under Signatures. The provider opens it, chooses who is signing, hands over the device, and taps Save signature.
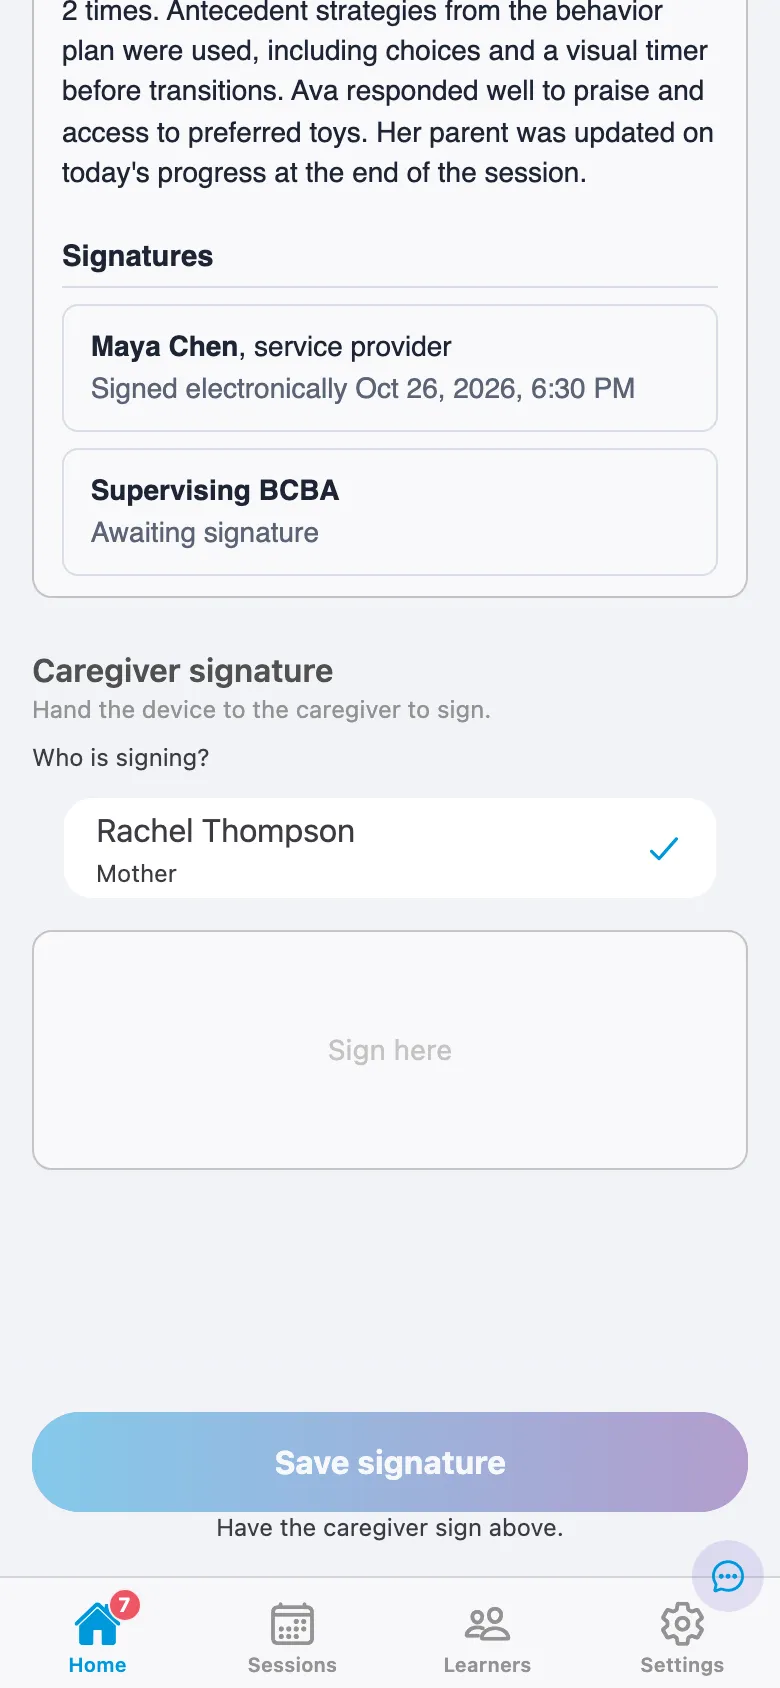
A caregiver signature belongs to one version of the note. If the provider edits and resubmits the note, the caregiver signs again.
The signed note
Section titled “The signed note”In Note, the Session Note tab of a submitted session shows the signed document, with each signature’s status.
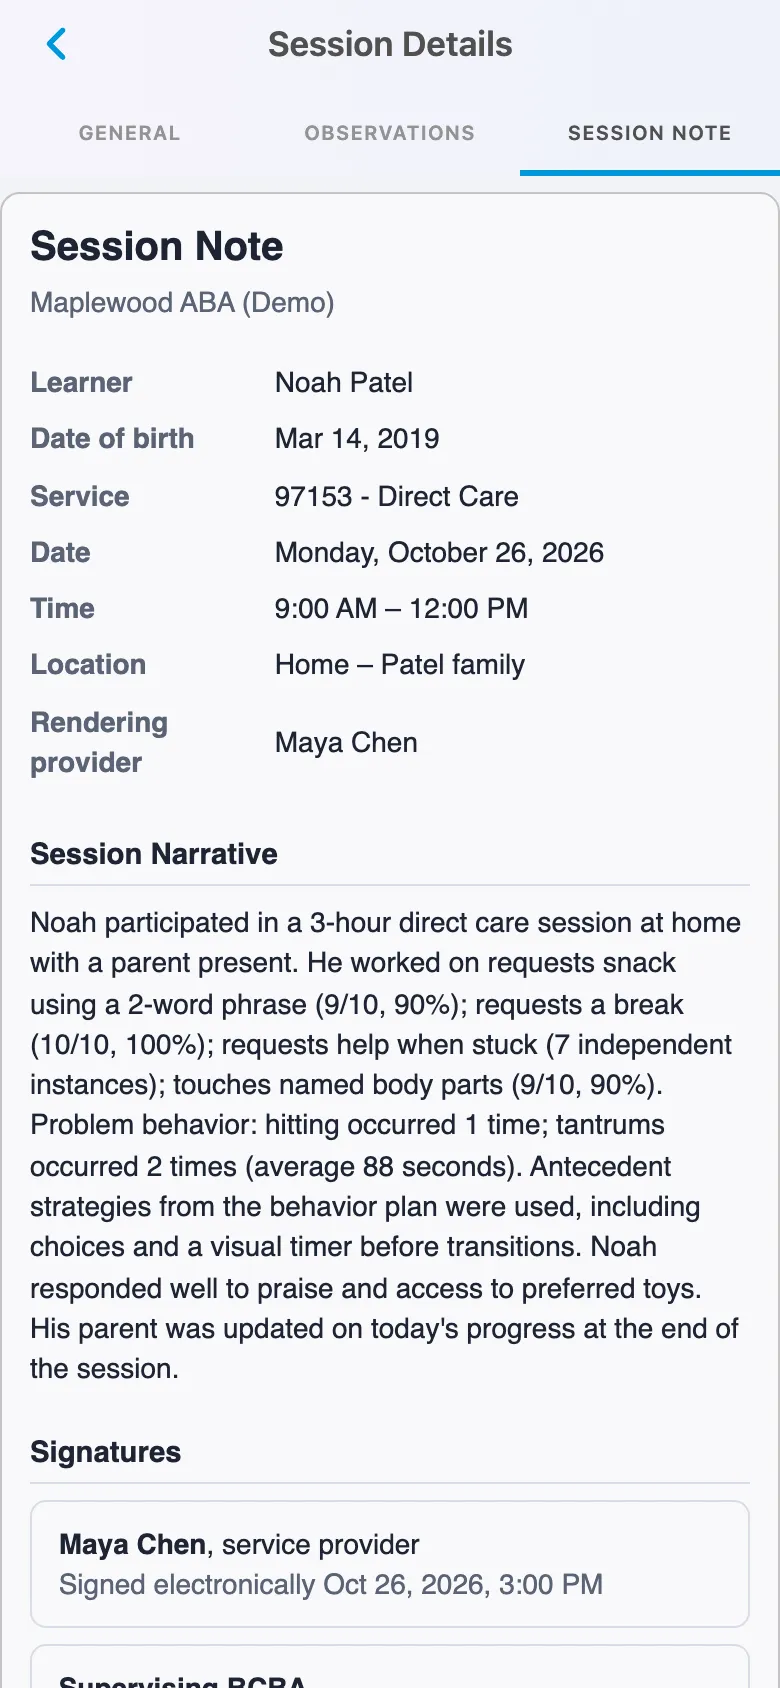
In Chorus, open the session and choose ⋯ → Export session notes to create the note as a PDF, in the same layout as Preview, with its signatures. The session’s Clinical tab has a Signatures card that lists each signature, with its drawing, and whether it’s signed, revoked or replaced by a newer one.
How a session gets its template
Section titled “How a session gets its template”Note picks the template when the provider opens the Session Note tab.
- By service. This is how it works at first: each session uses your template for its kind of note.
- By payer and procedure code. With Template assignment by payer code on, the session uses the template whose Used for list matches the payer and procedure code on its authorization.
When templates are assigned by payer and code and nothing matches, the provider gets a single Session Notes box instead of your sections. A session with no authorization doesn’t get a template either.
Check template coverage
Section titled “Check template coverage”Before you assign templates by payer and code, click Template coverage on the Templates page. It lists the payers and procedure codes on your active authorizations in three tabs: those with no template, those on the wrong kind of template, and assignments that aren’t in use, for example because the template is still a draft.
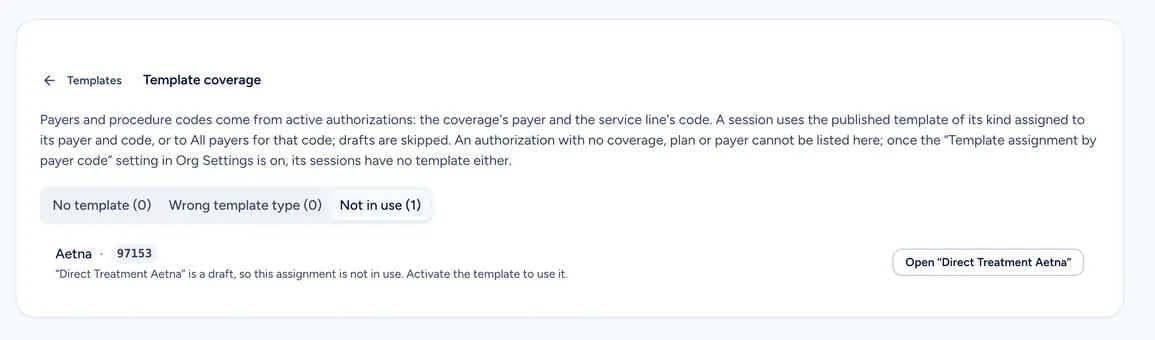
Clear the first two tabs before you turn the switch on.
Turn templates on
Section titled “Turn templates on”The switches are in Chorus, under Administration → Org Settings → Feature flags. All of them start off.
| Switch | What it does |
|---|---|
| Chorus note templates | The main switch. Note builds session notes from your templates, and providers complete them using your sections and fields. Fields you marked Required are checked from then on. |
| Template assignment by payer code | Sessions pick their template by payer and procedure code. Turn it on only after template coverage is clear. |
| Session note signatures | Sign & Submit shows the full note and collects each template’s signatures. |
| Supervising BCBA signature | Supervising BCBAs get a list of submitted notes to co-sign. Needs Session note signatures. |
| Home dashboard | Turns on the Home tab, where providers find notes to finish, notes to co-sign and caregiver signatures to collect. |
| Signature location | Records where the device was when a caregiver signed. A signature made far from the session’s location is flagged on the session in Chorus. Nothing is blocked. |
Each switch can also be turned on for named people only. Use that to try templates with a few providers first.
A good order:
- Review each template and its preview.
- If you’ll assign templates by payer and code, clear Template coverage.
- Turn the switches on for a few providers, and have them write and submit real notes.
- Turn the switches on for the whole organization.