

Create, edit and cancel a session
Create a session
Section titled “Create a session”-
On the Sessions tab, tap +.
-
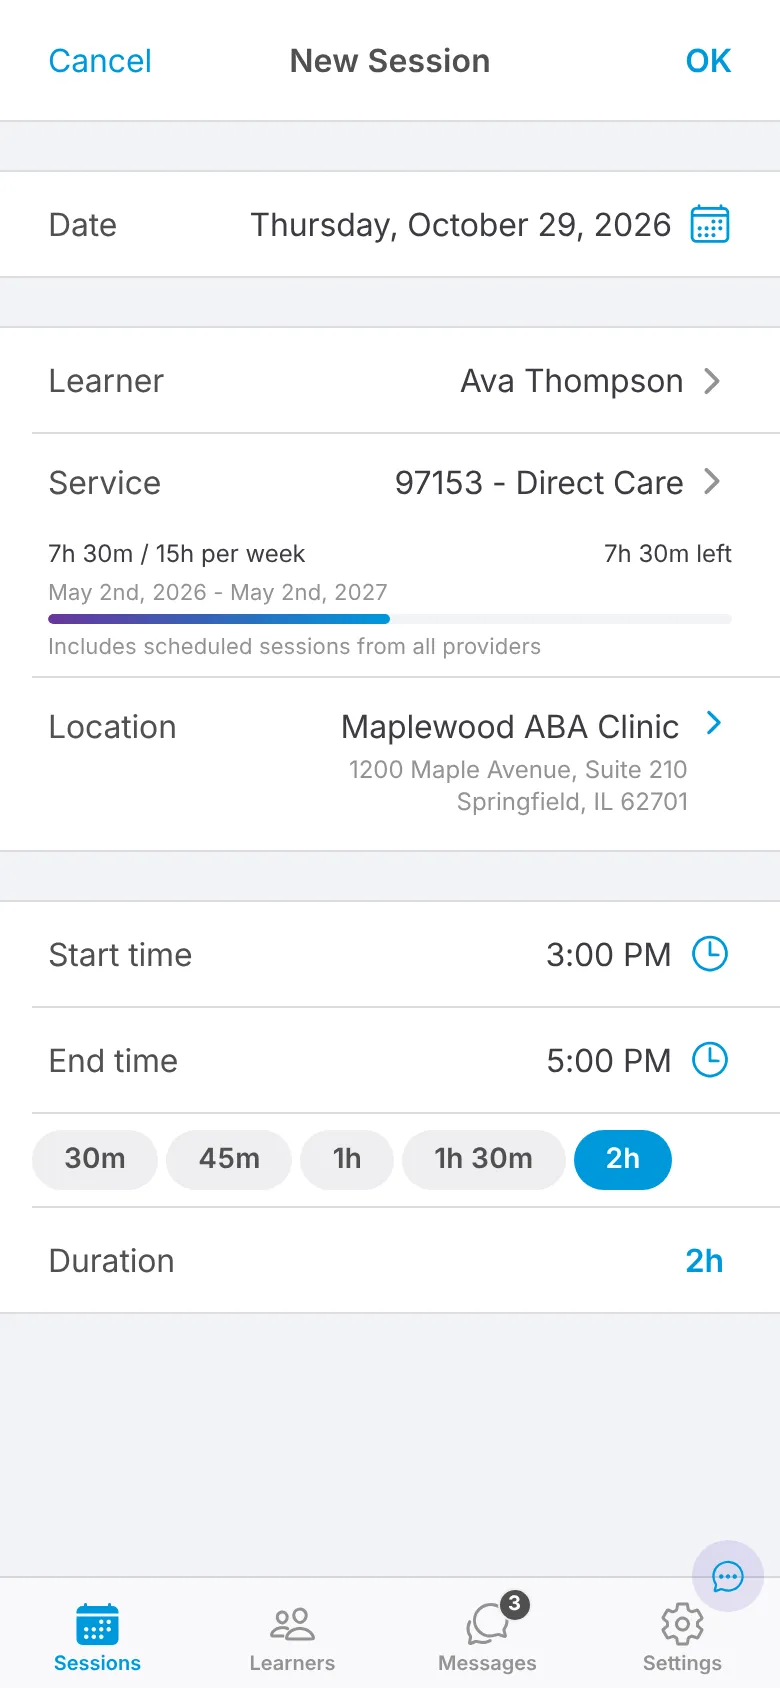
Fill in the session details, top to bottom. Each field unlocks the next:
- Date
- Learner: the learners you can schedule on that date.
- Service: the services you’re assigned to provide for that learner. Each one shows how many of your assigned hours for the period, such as this week, are already used by your sessions, including scheduled ones.
- Location
- Start time and End time
-
Tap OK.
The new session shows on your list as Scheduled. Your organization’s server checks it in the background; until it does, the General tab shows “Validating…”.
Edit a session
Section titled “Edit a session”- Open the session.
- Tap Edit at the top right.
- Change the details, then tap OK.
You can’t edit a session that is Validating, Submitted or Canceled.
Cancel a session
Section titled “Cancel a session”- Open the session and tap Edit.
- Tap Cancel Session at the bottom.
- Choose a reason:
- Provider cancellation
- Learner absence
- Learner unavailable
- Mandate completed this week
- School closure
- School event trip
- Holiday
- Confirm.
The session stays on your list, crossed out, with the reason on its General tab. If you canceled it by mistake, open it and tap Reschedule.