

Sign and submit a session
Submitting a session signs it electronically and sends it to your organization. After you submit, the session can’t be changed.
Before you start
Section titled “Before you start”You can submit a session when:
- it is your session,
- its scheduled end time has passed, and
- its status is Ready to submit: it has its session data and note, and your organization’s checks passed.
Submit
Section titled “Submit”-
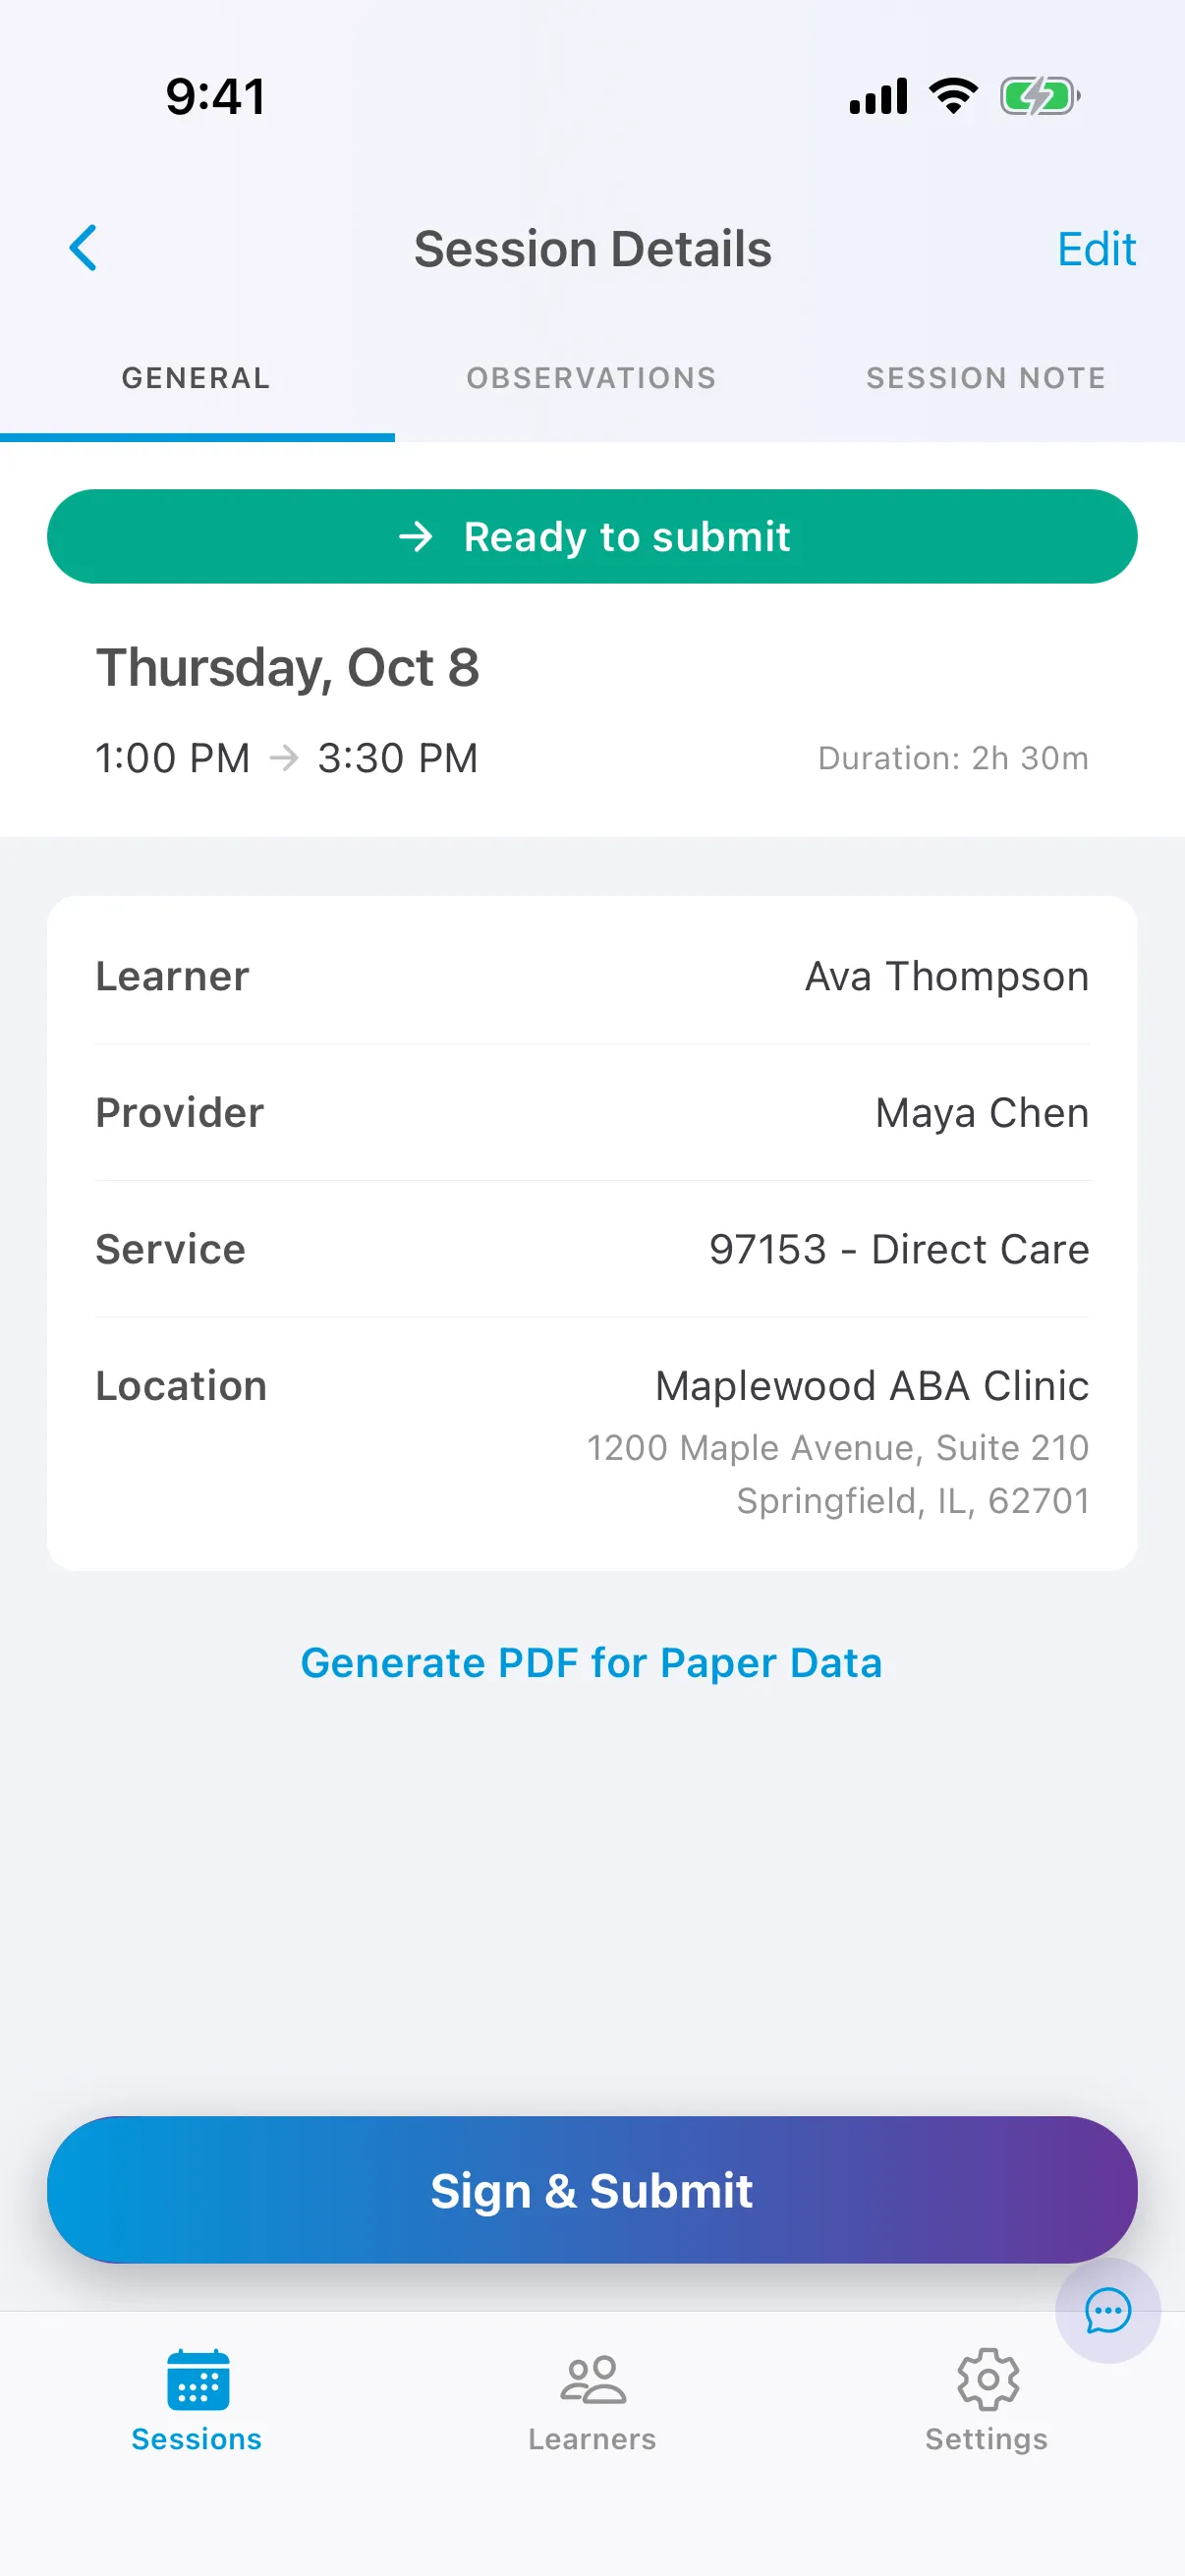
Open the session. The General tab shows Ready to submit.
-
Tap Sign & Submit. Note checks the session with your organization one more time.
-
Read the statement and tap Submit.
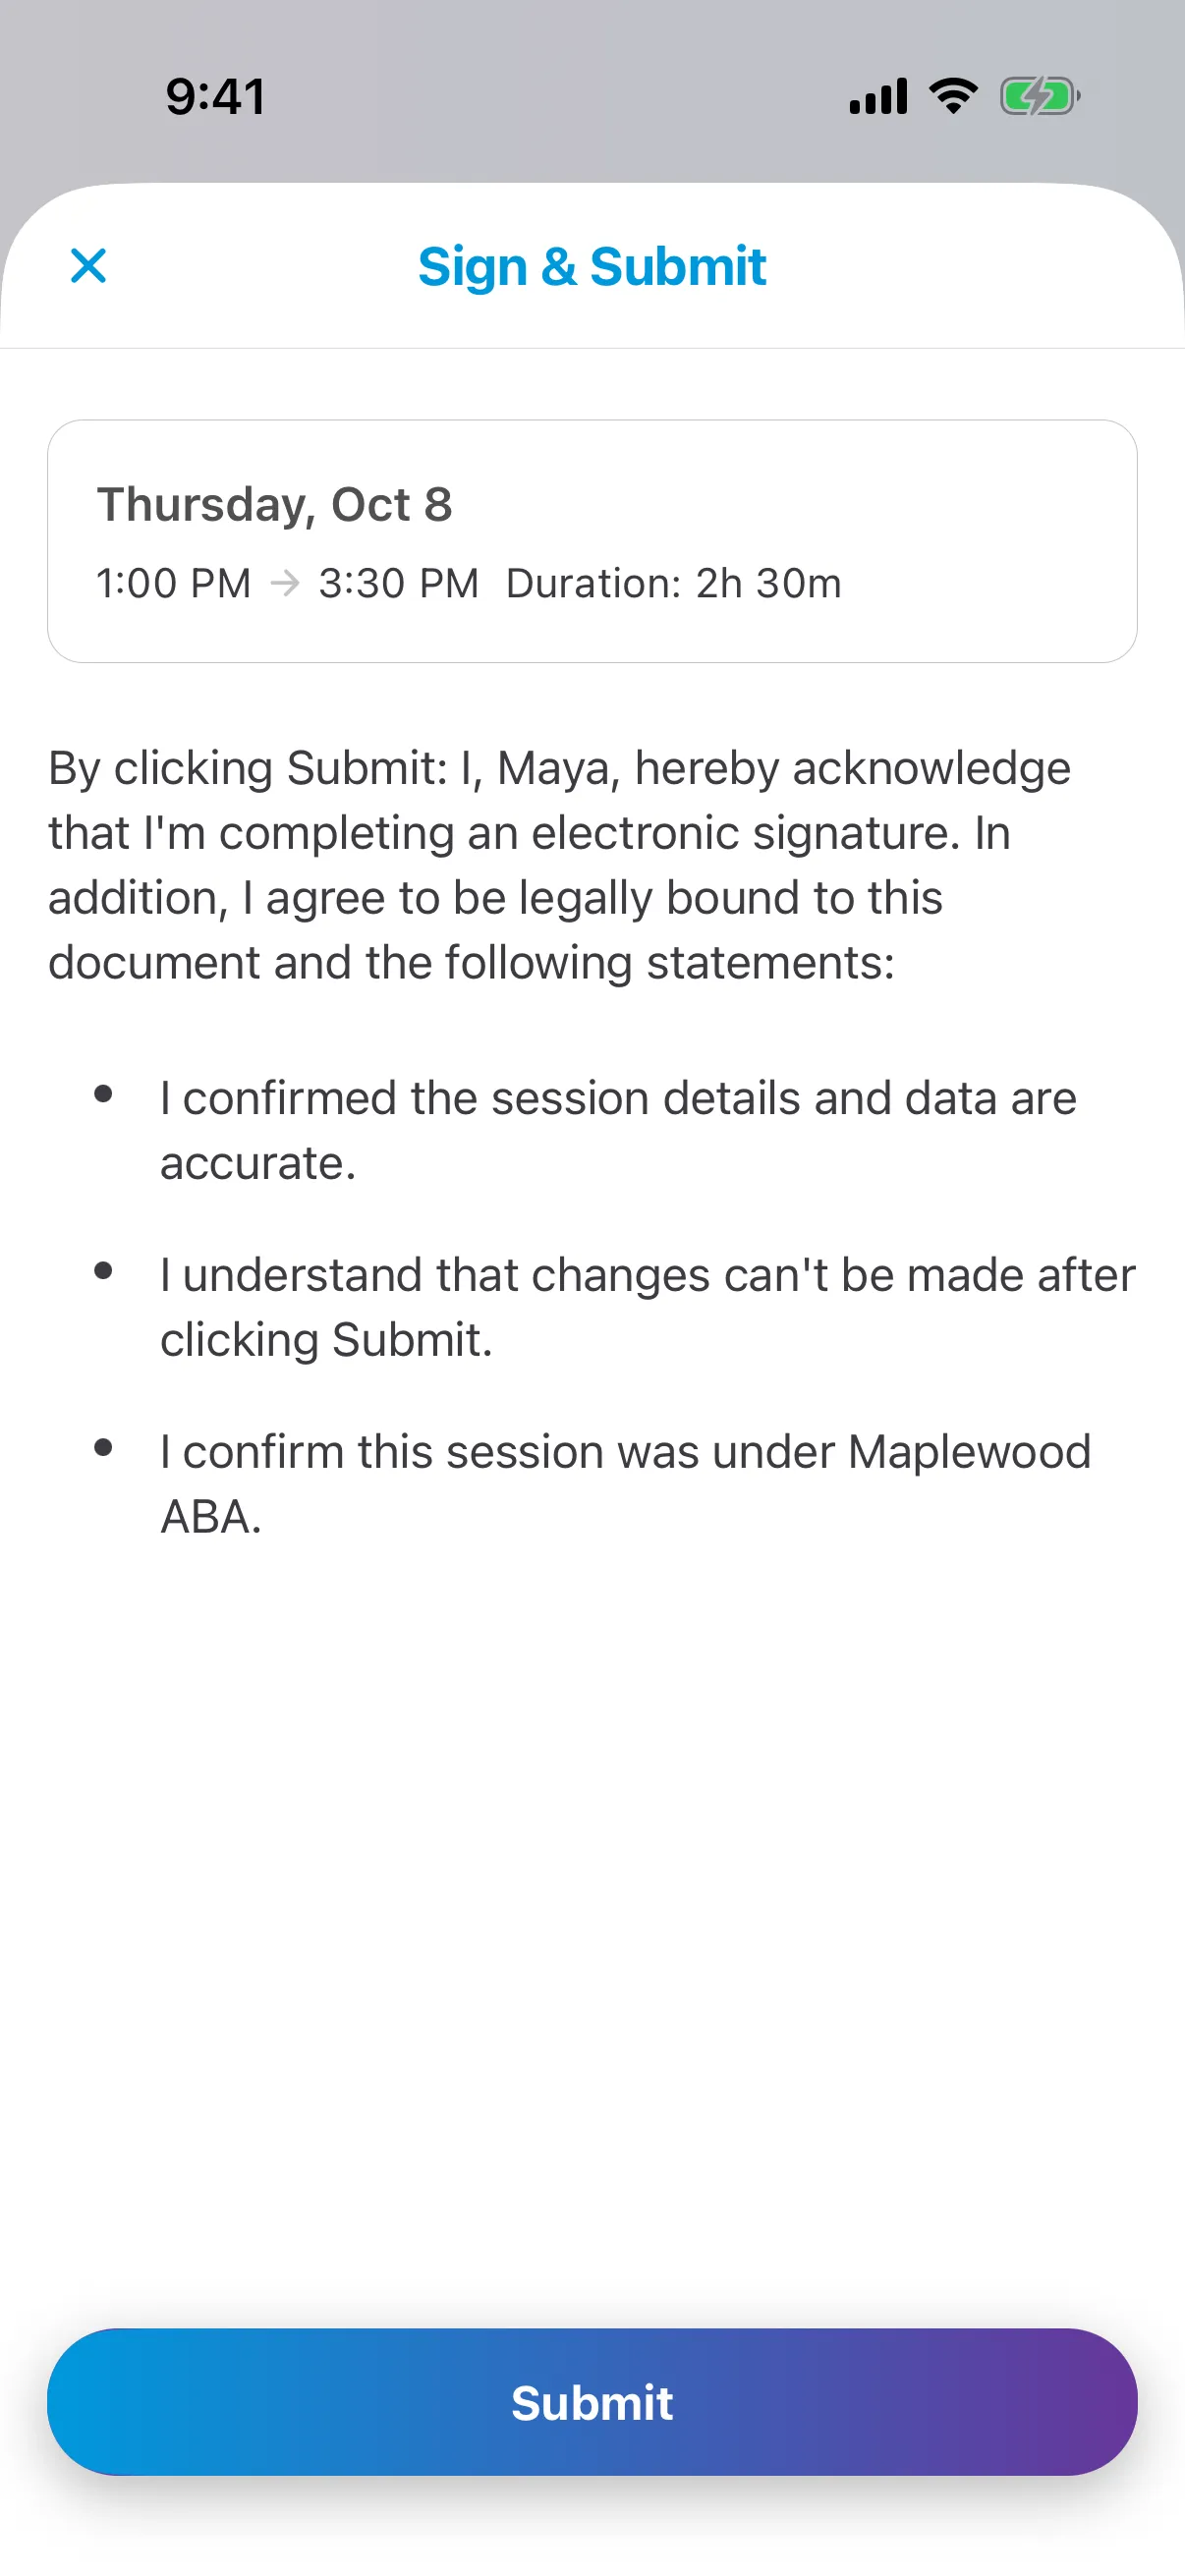
The session’s status changes to Submitted.
If the session can’t be submitted
Section titled “If the session can’t be submitted”Note checks the session with your organization when you tap Sign & Submit. If something isn’t right, you see Session Cannot be Submitted and a reason:
| The message begins… | What it means | What to do |
|---|---|---|
| “This session was declined…” | Your organization found a problem. | Read the reason on the General tab. See Why a session was declined. |
| “The server is still validating this session…” | Your organization hasn’t finished checking it. This usually takes under a minute. | Tap Retry. |
| “This session’s recorded data is still uploading…” | Your latest changes haven’t reached your organization yet. | Stay online, wait a moment, and tap Retry. |
| “The server could not validate this session…” | The check failed on your organization’s side. Note asks for it to be checked again. | Try again later. If it keeps happening, contact your organization. |
| “This session has not passed validation yet…” | Your organization has no result for this session. | Open Settings, tap Sync now, then try again. If it keeps happening, contact your organization. |